
How to share your design files using OneDrive
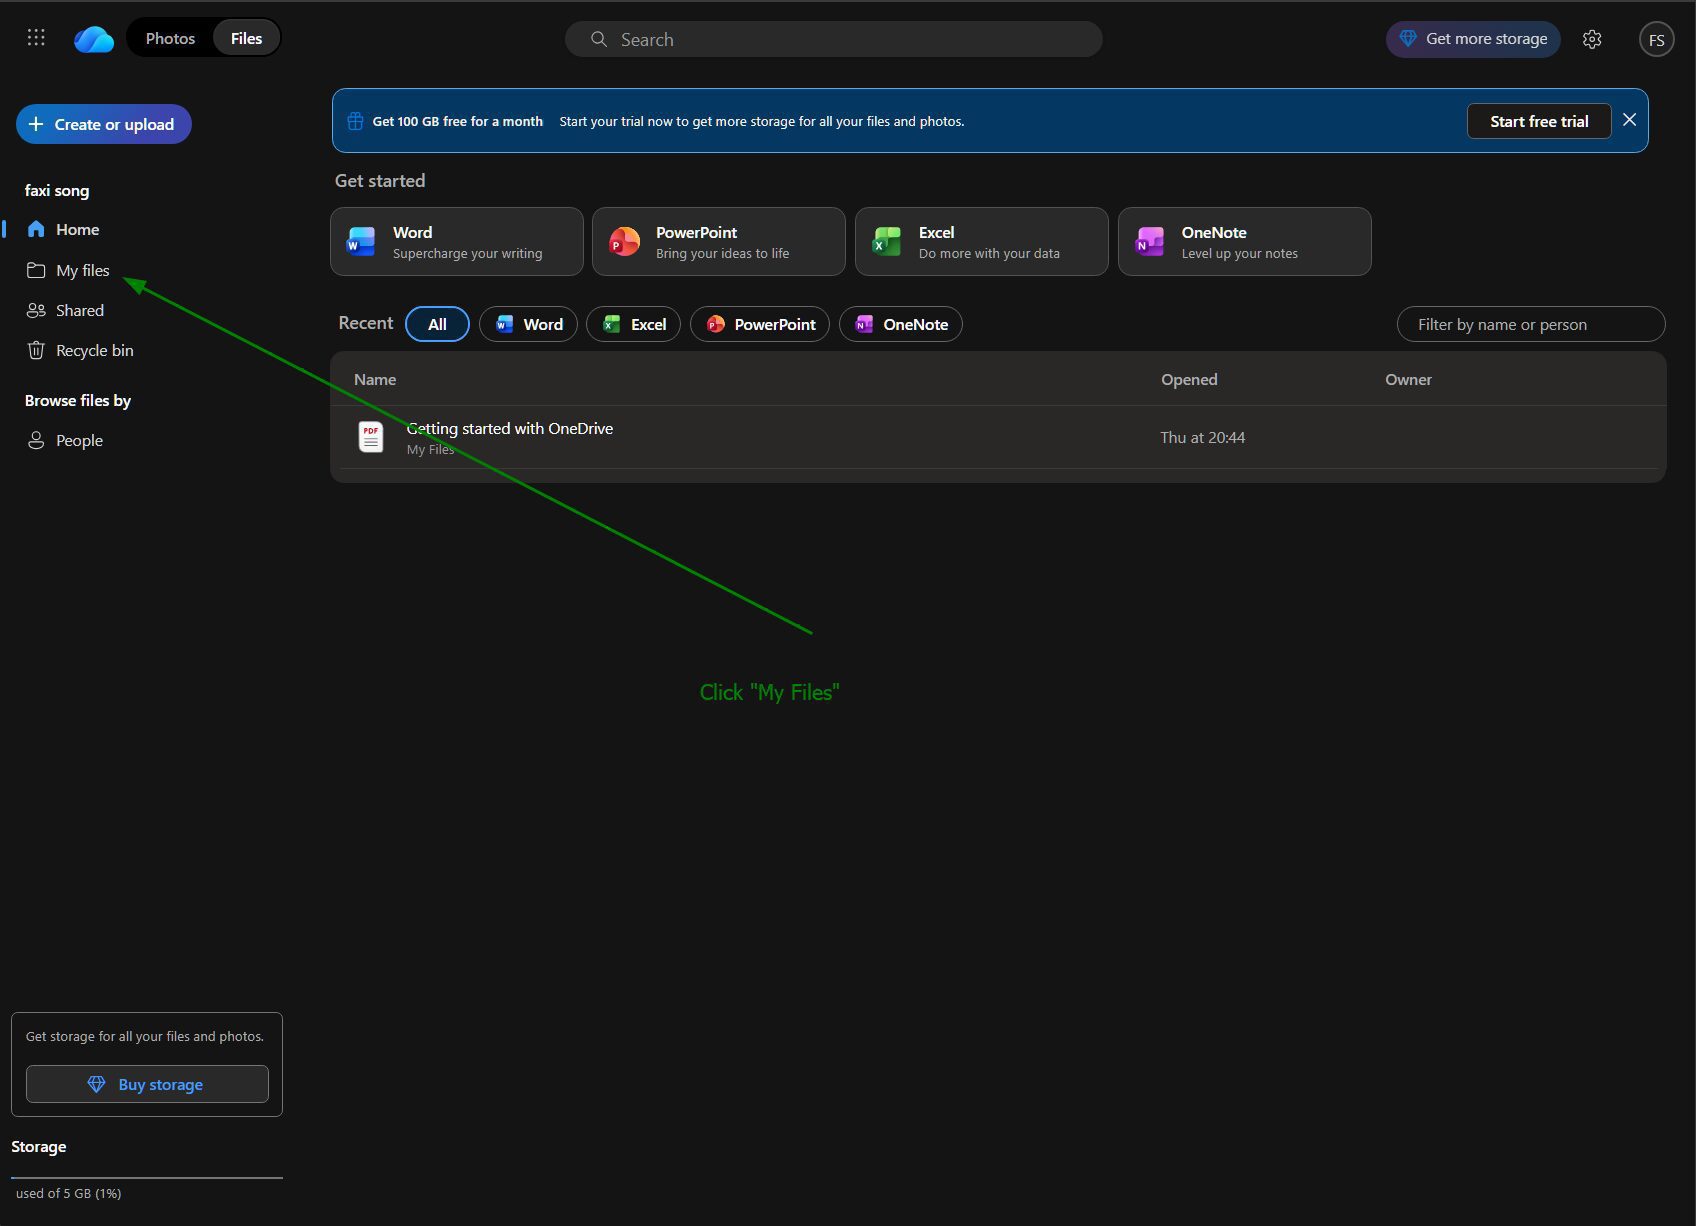
Step 1 — Open OneDrive and click “My Files” in the left sidebar
Go to onedrive.live.com and sign in. Click My Files in the left sidebar to view your files.
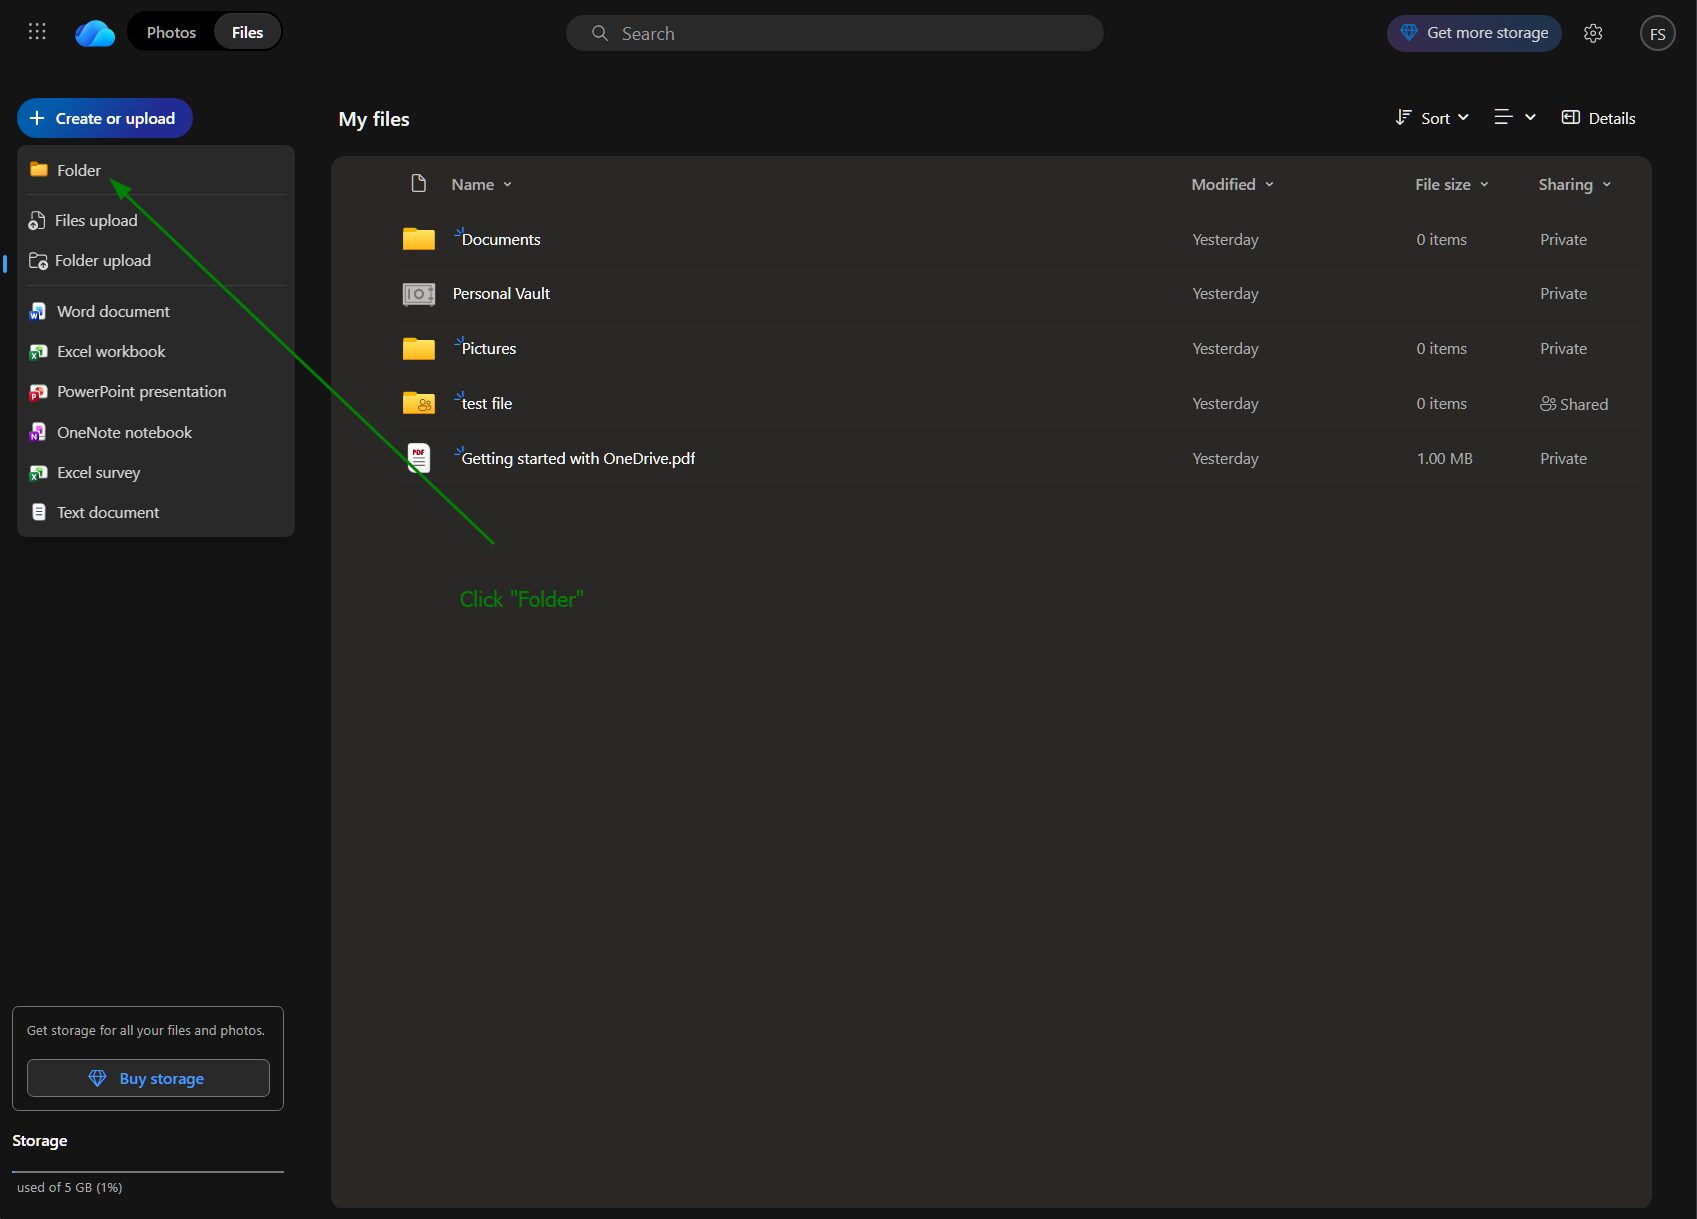
Step 2 — Click “+ Create or upload” at the top left and select “Folder” from the dropdown
Click the + Create or upload button at the top left, then select Folder from the dropdown menu.
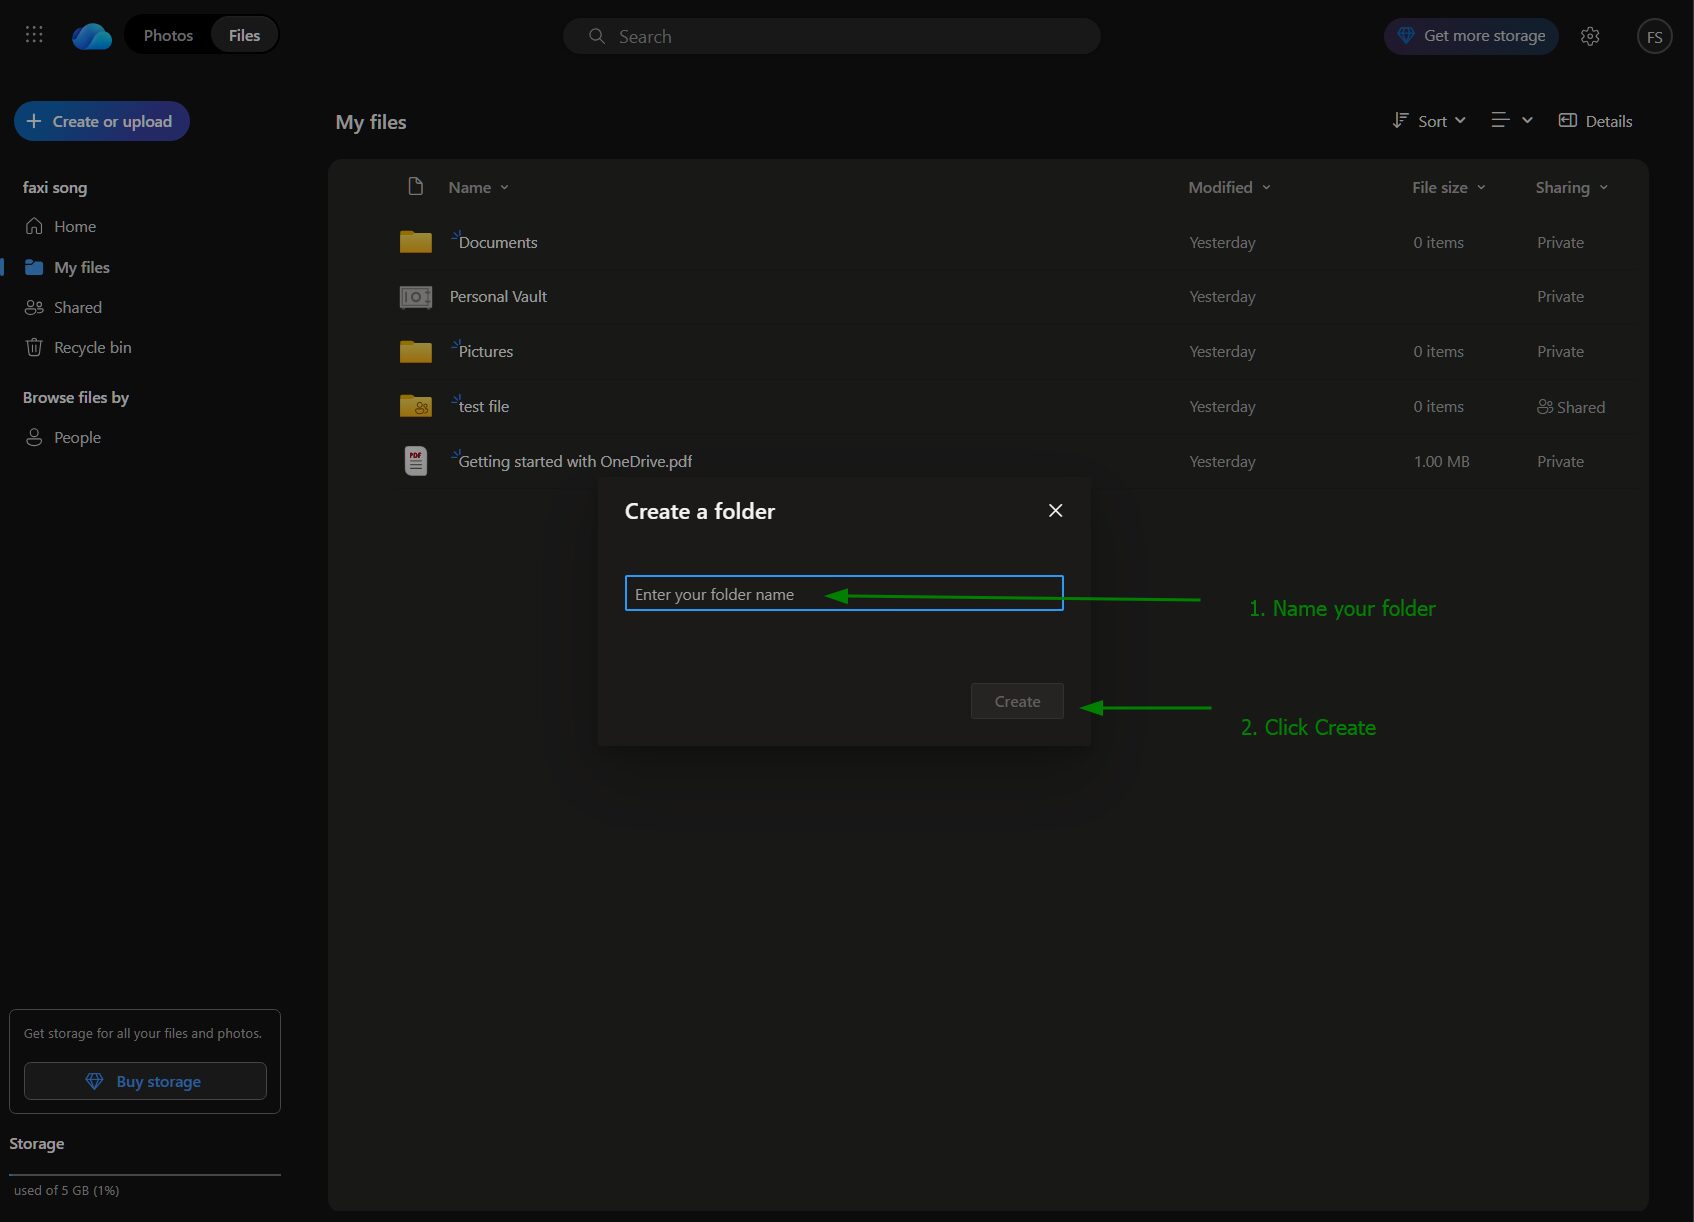
Step 3 — Enter a name for your folder (e.g. InkyCustoms Order) and click Create
Type a name for your folder — such as InkyCustoms Order — then click Create to confirm.
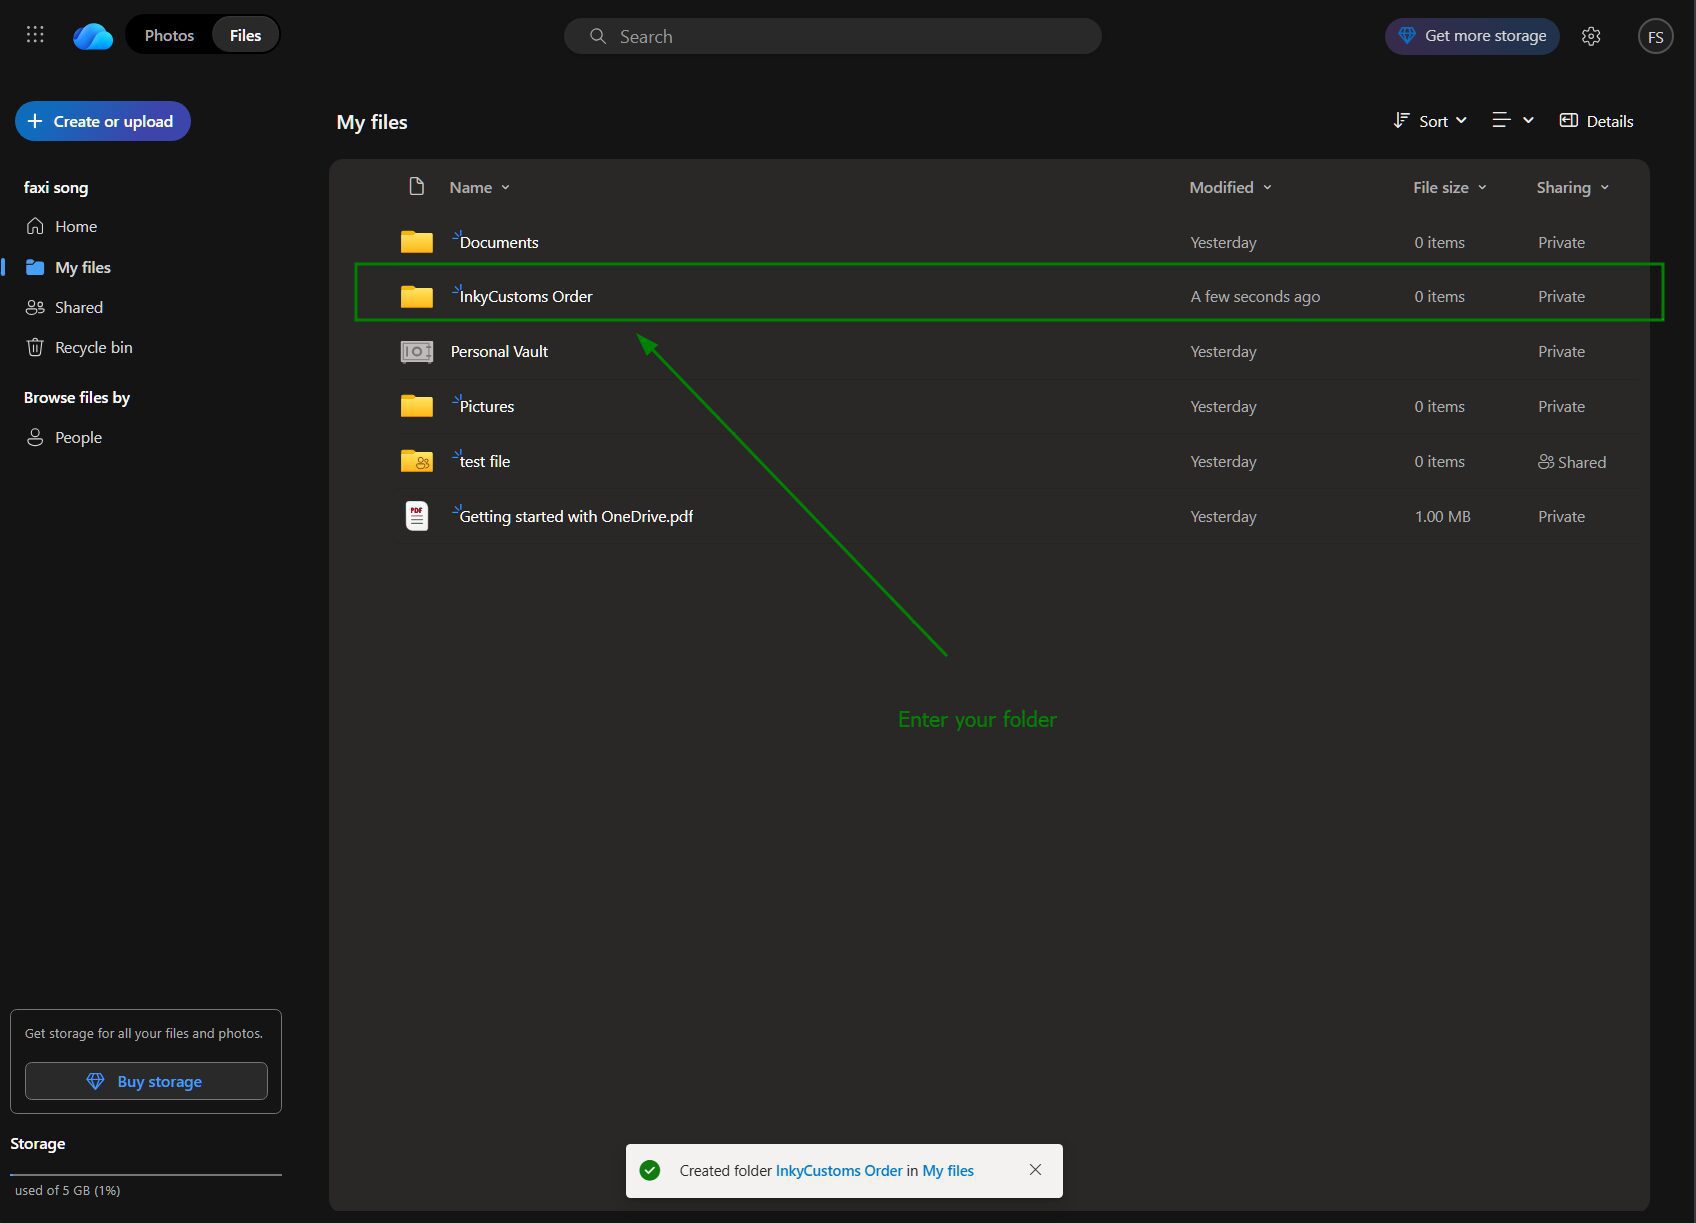
Step 4 — Your new folder has been created and will appear in My Files — double click it to open it
Your new folder will now appear in My Files. Double-click it to open it and get it ready for your design files.
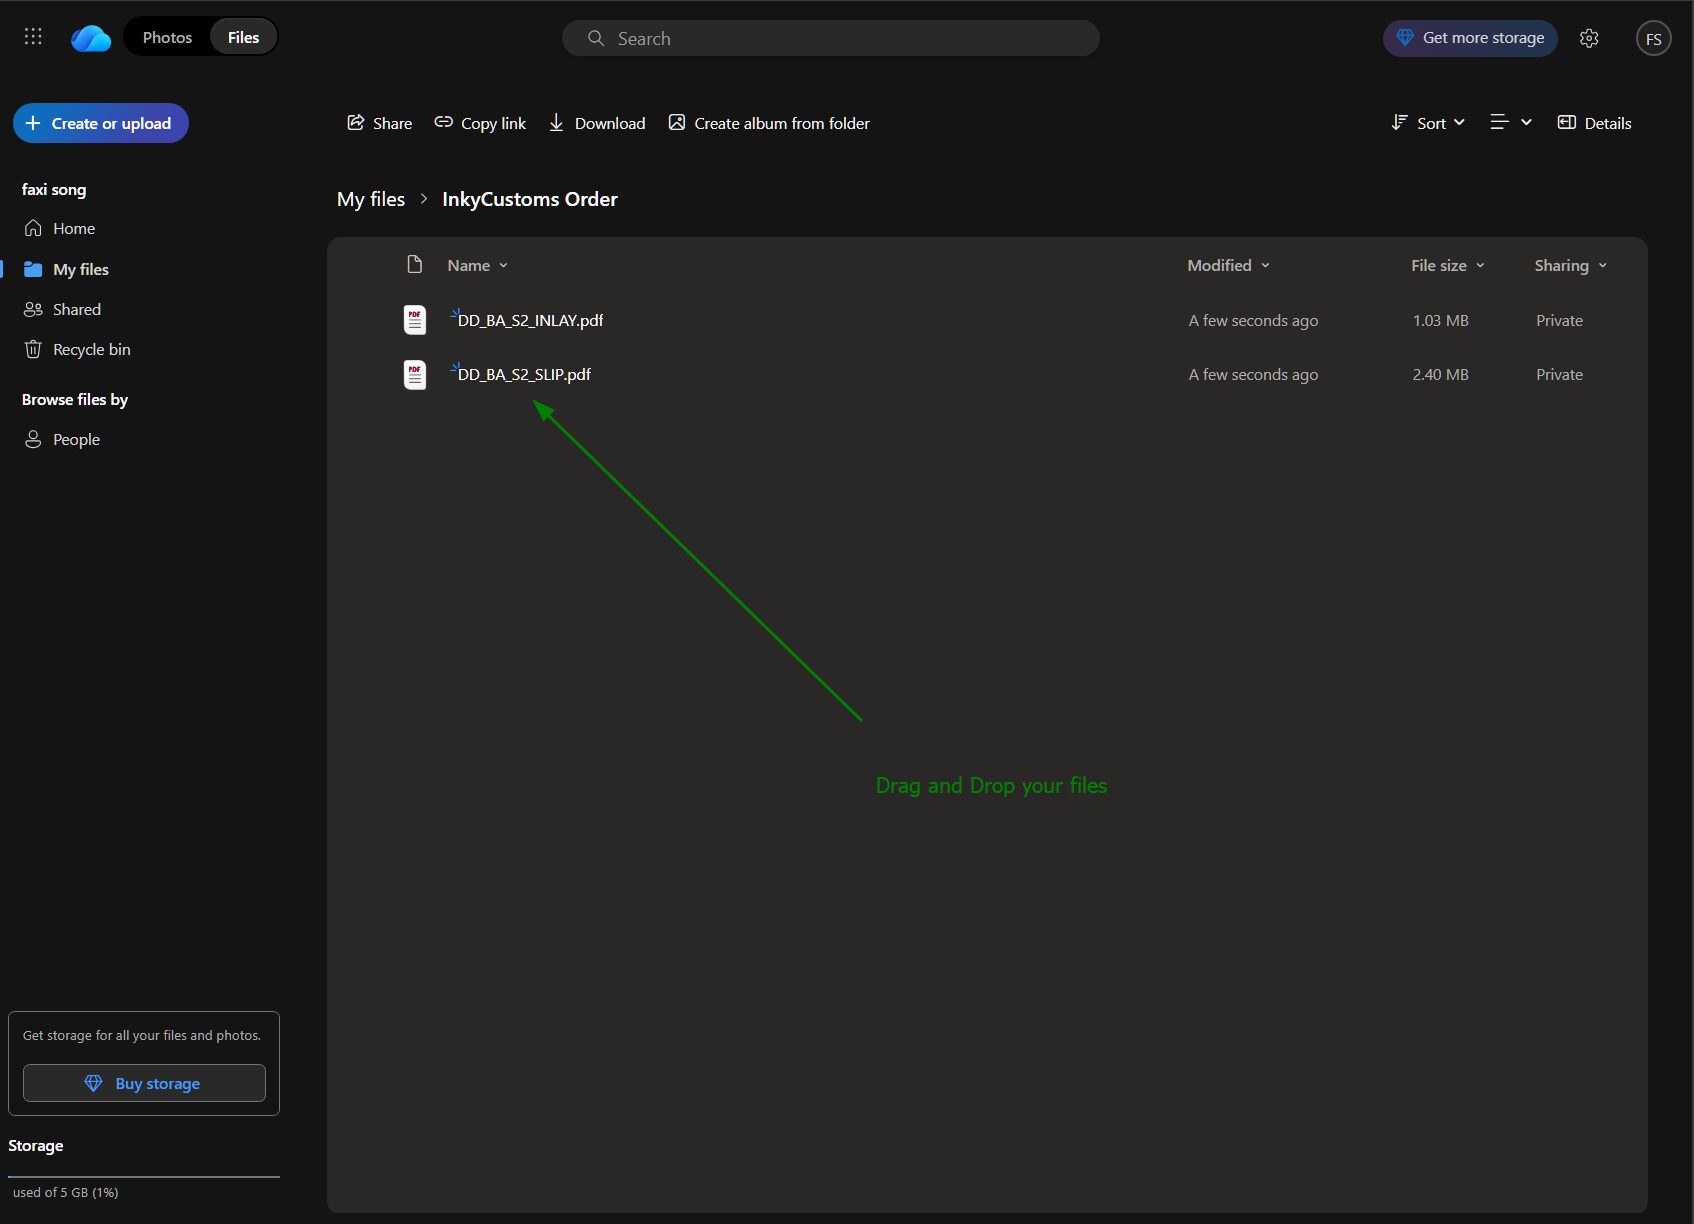
Step 5 — Drag and drop your design files into the folder and wait for them to finish uploading
Drag your design files from your computer and drop them into the open folder. Wait until all files have finished uploading before moving on.
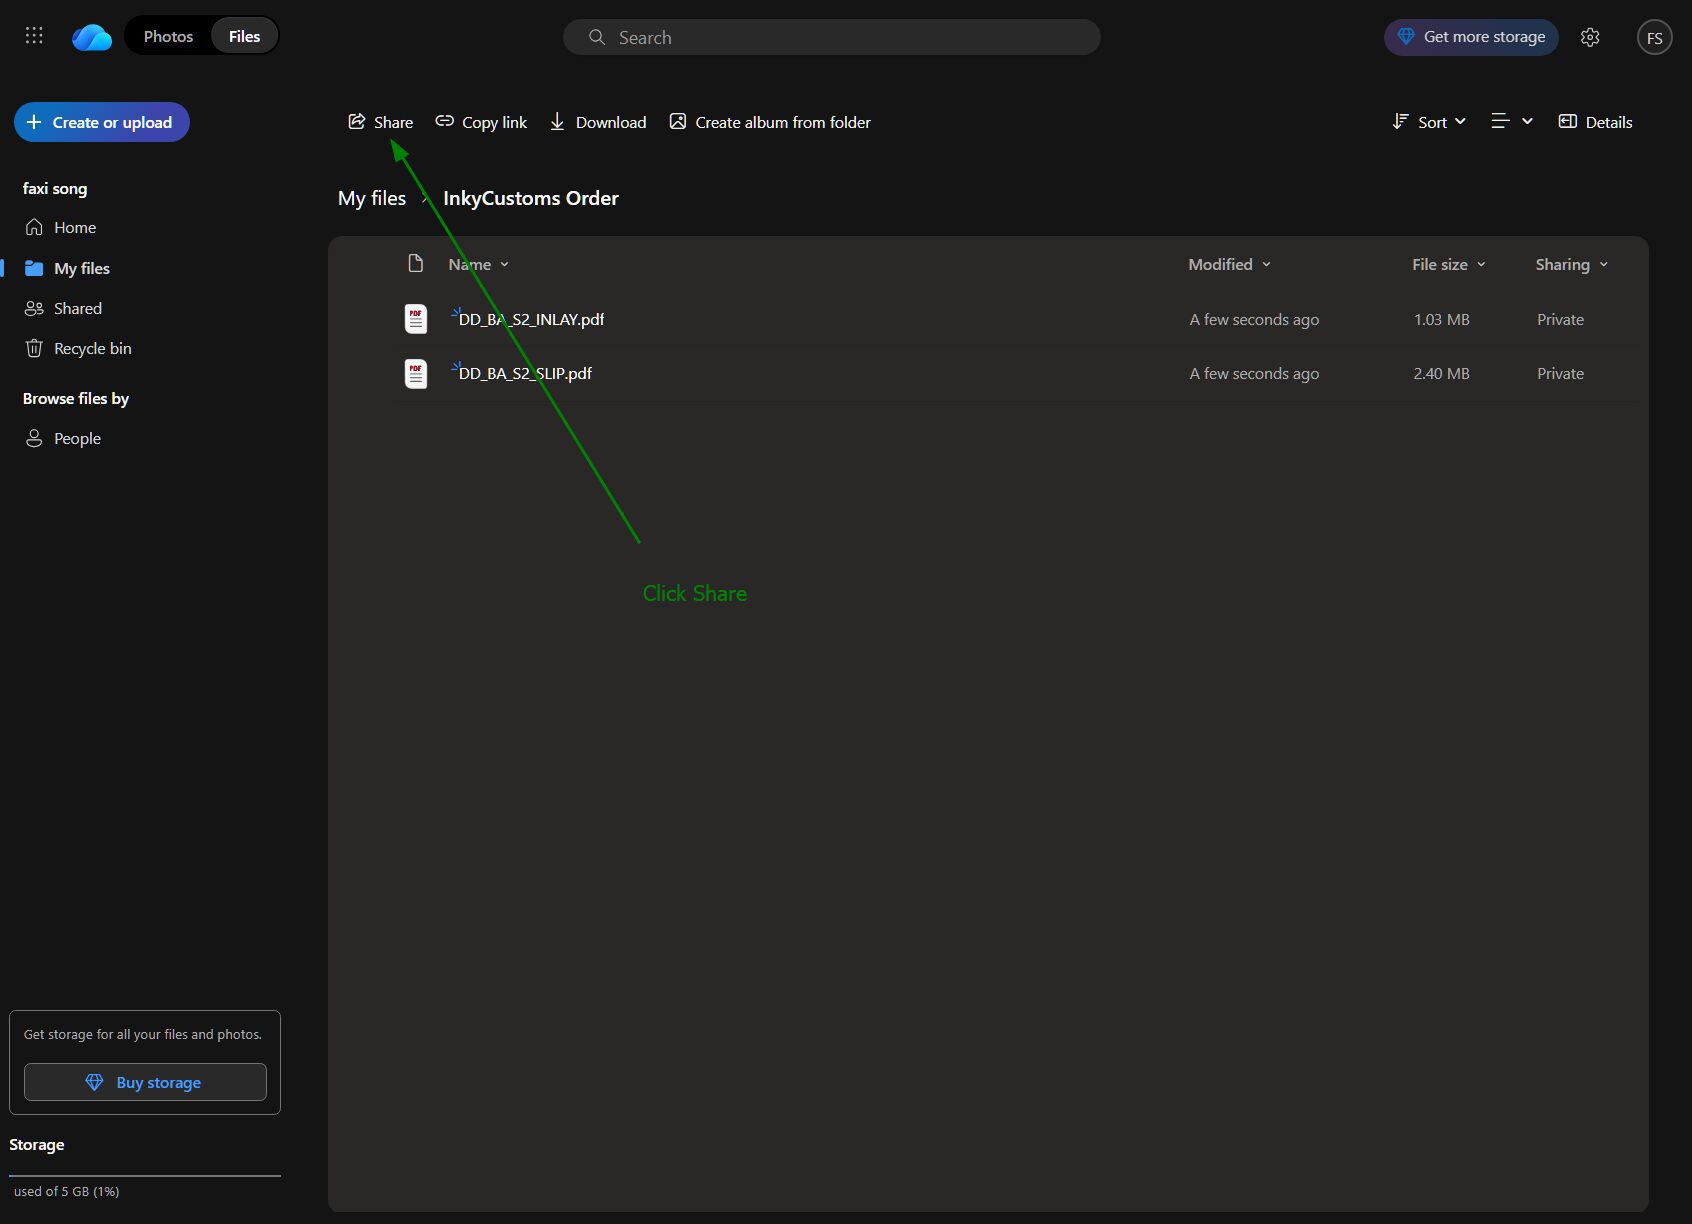
Step 6 — Once your files are uploaded click the “Share” button at the top of the page
Once all your files have uploaded, click the Share button at the top of the page to open the sharing options.
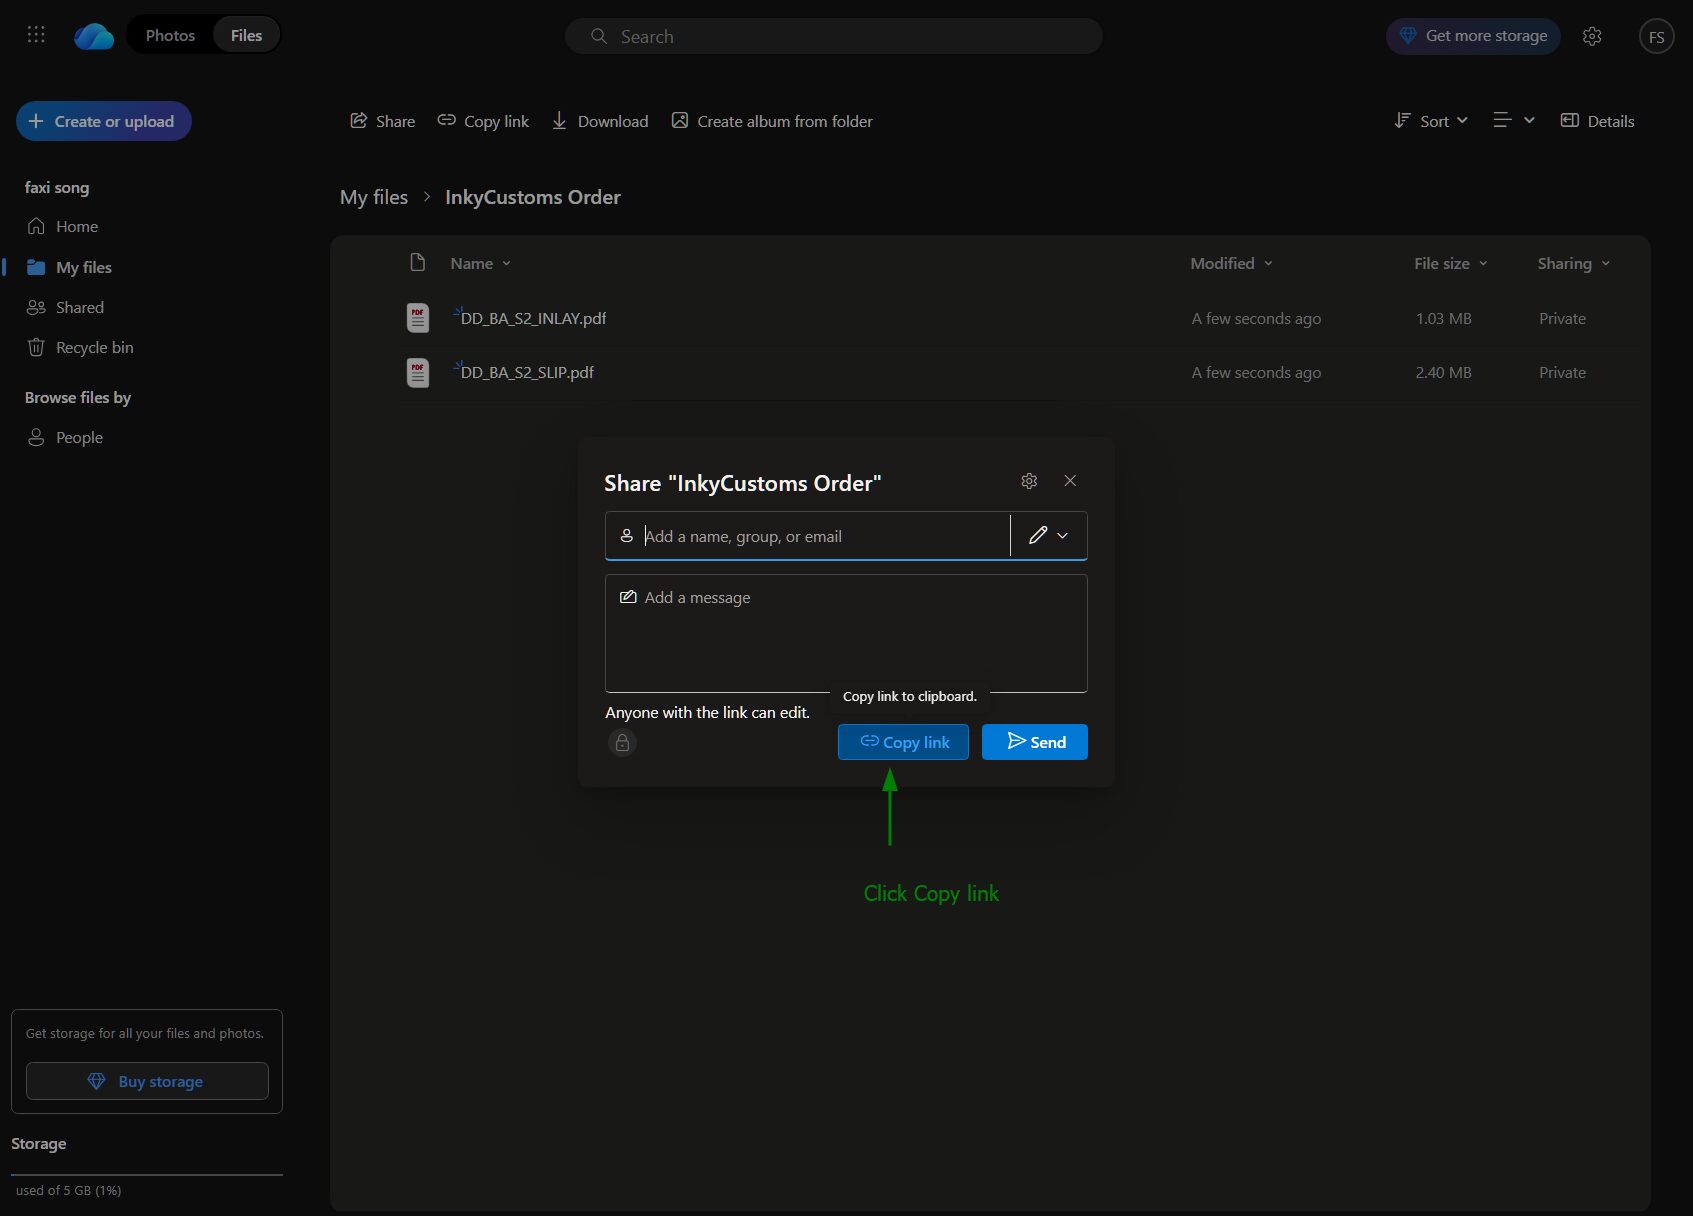
Step 7 — The share dialog will open. Click “Copy link” to copy your shareable link to the clipboard
In the share dialog that opens, click Copy link to copy your folder’s shareable link to the clipboard.
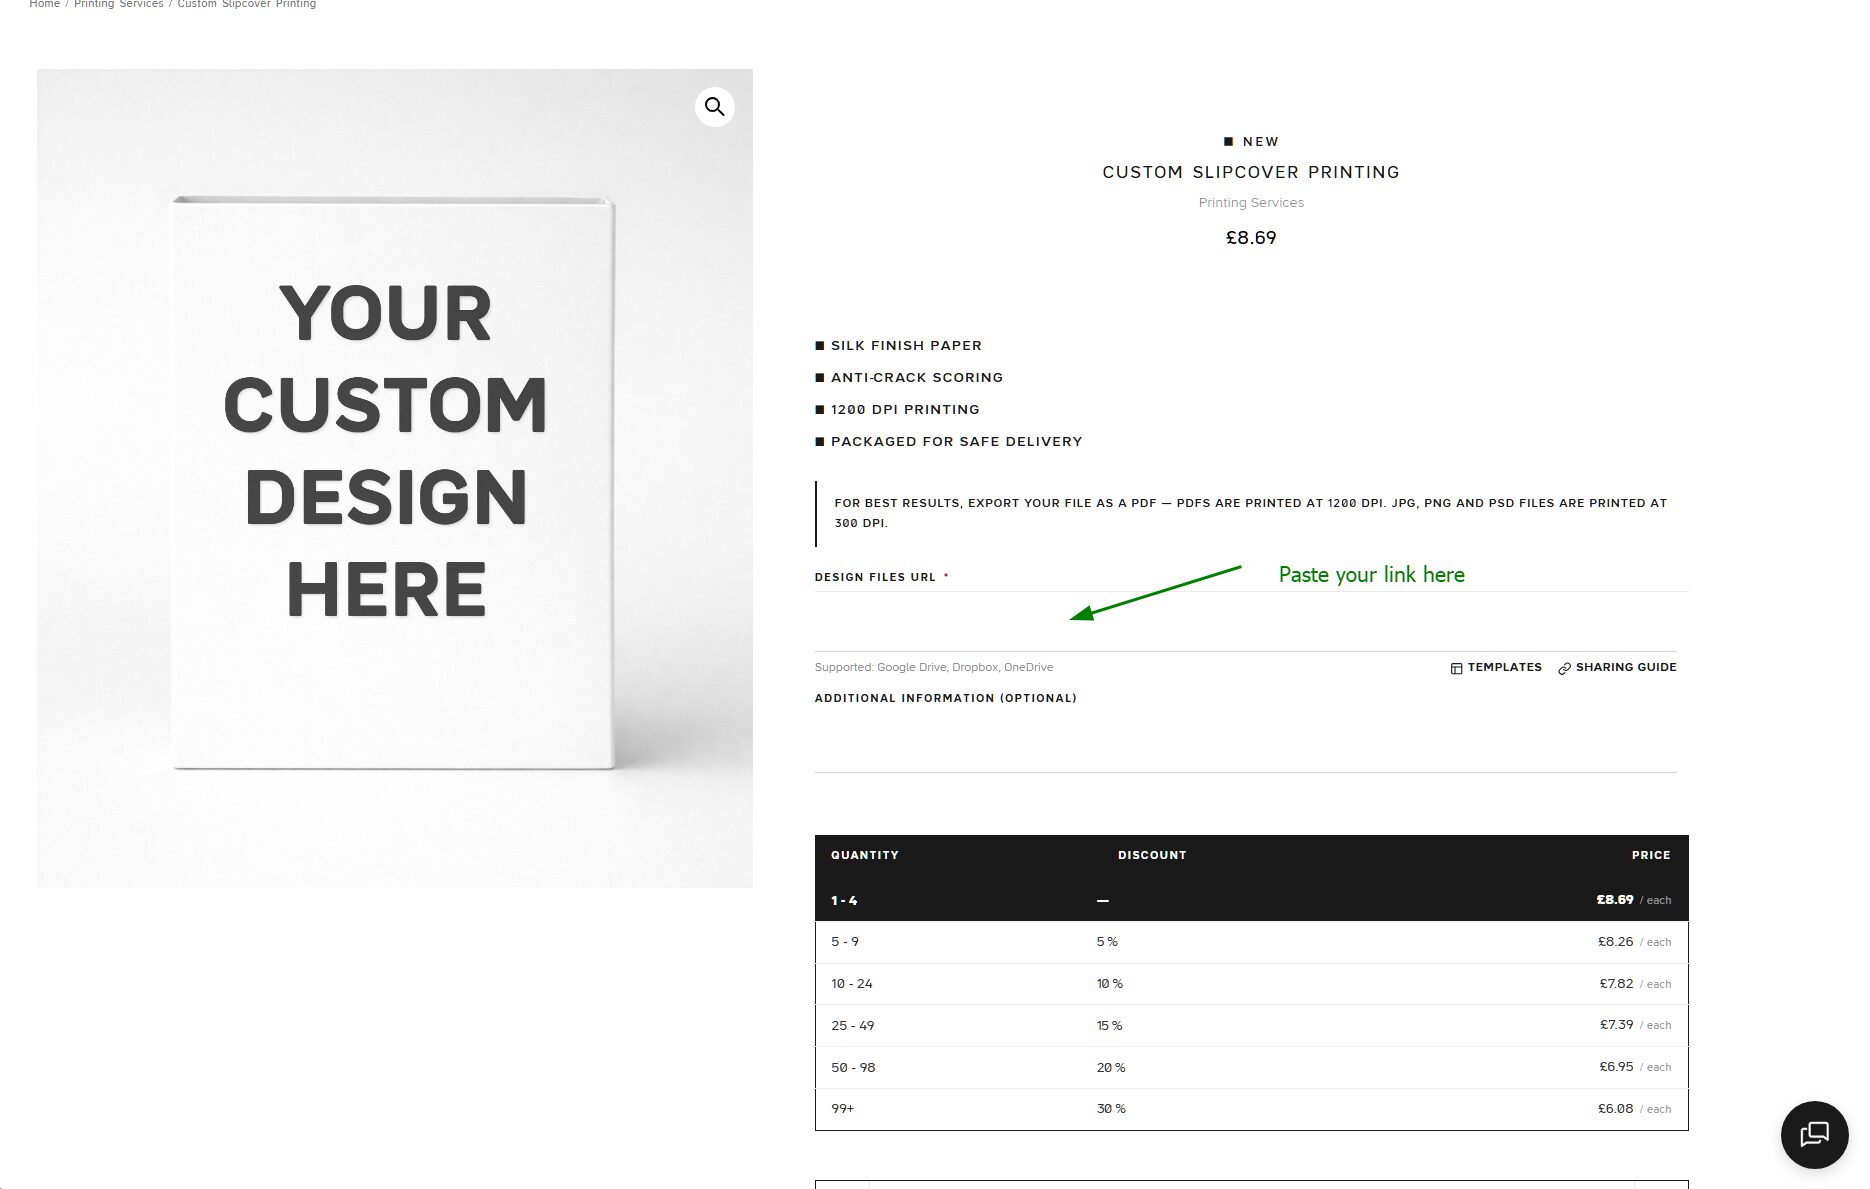
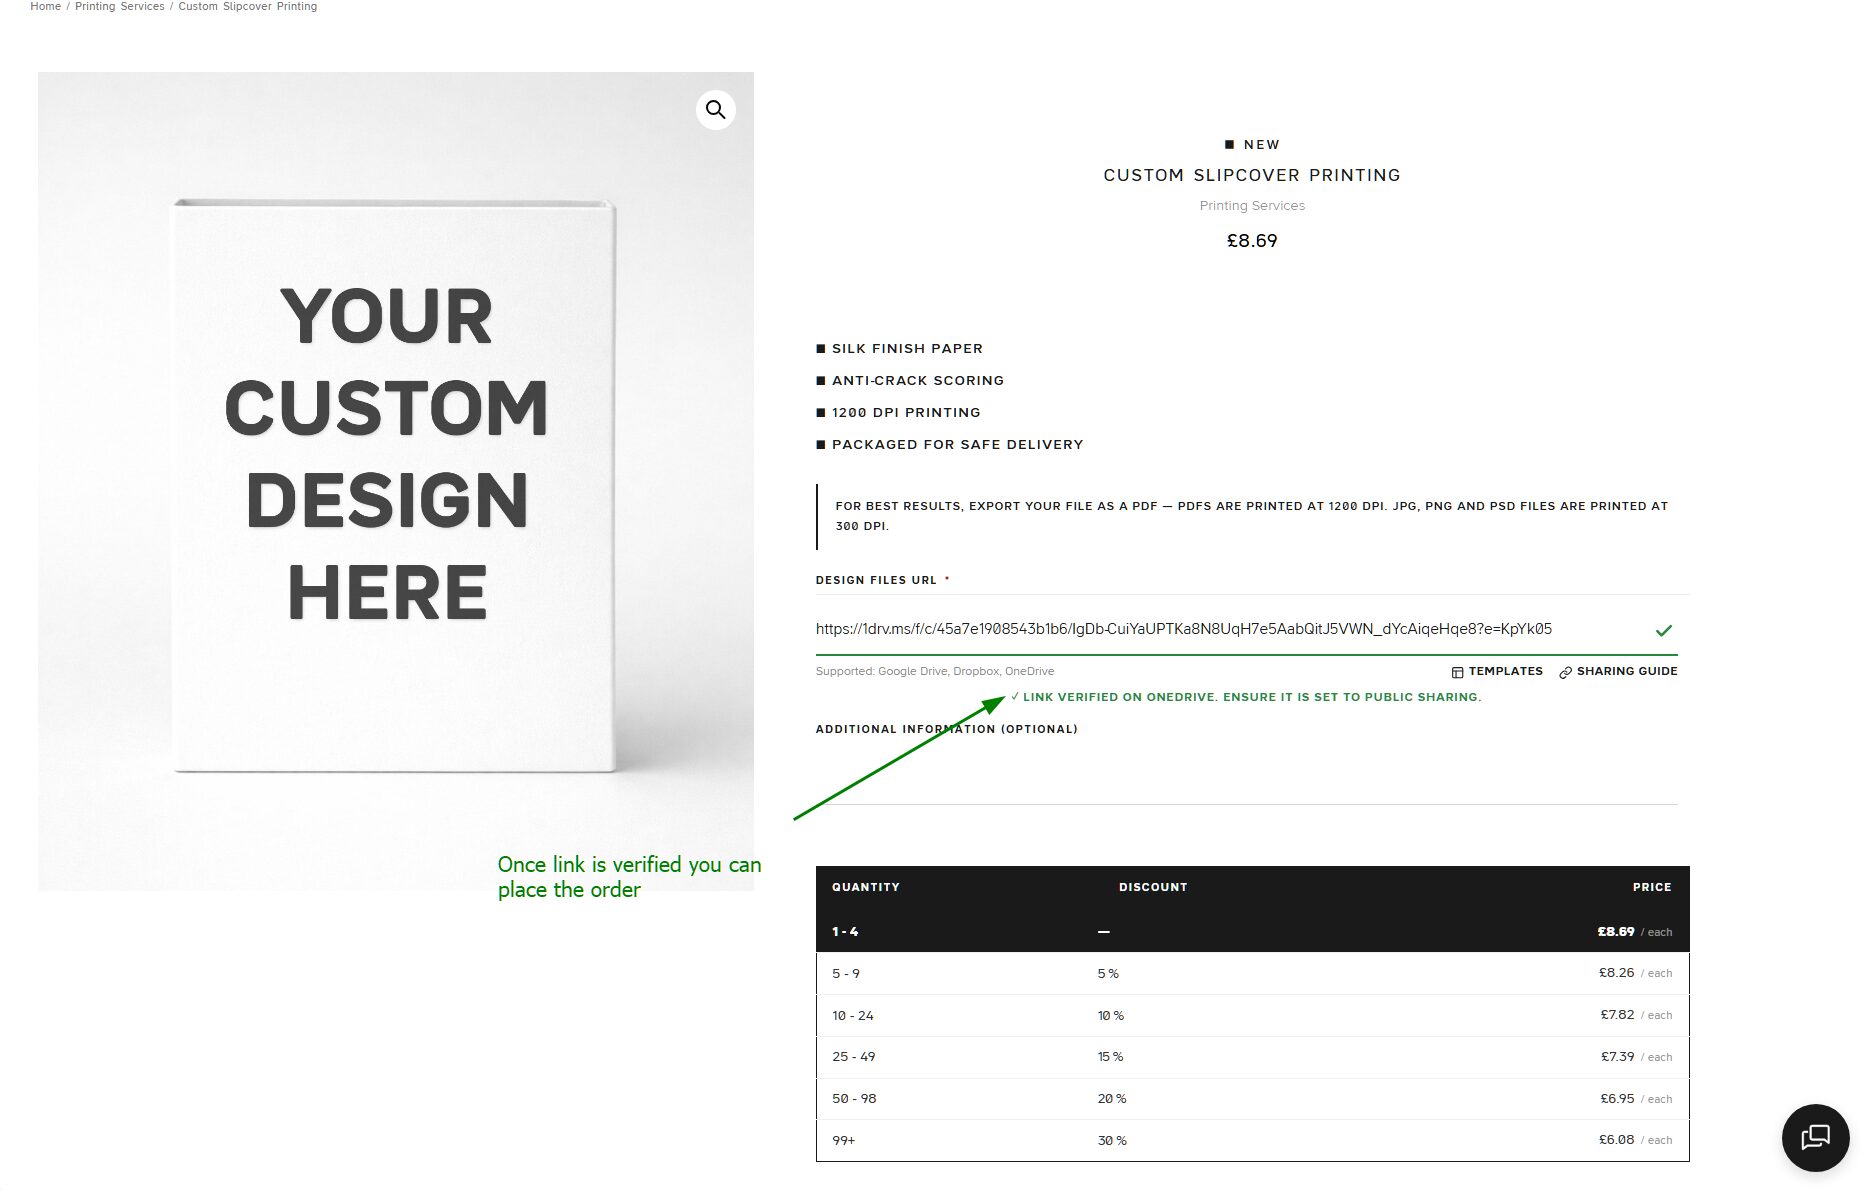
Step 8 — Go back to the InkyCustoms product page and paste your link into the Design Files URL field
Return to the InkyCustoms product page and paste your copied link into the Design Files URL field.
Step 9 — You will see “Link Verified on OneDrive” — once verified you can select your quantity and place your order
After pasting the link you should see Link Verified on OneDrive. Once verified, choose your quantity and place your order.
Having trouble? Contact us and we’ll be happy to help.