
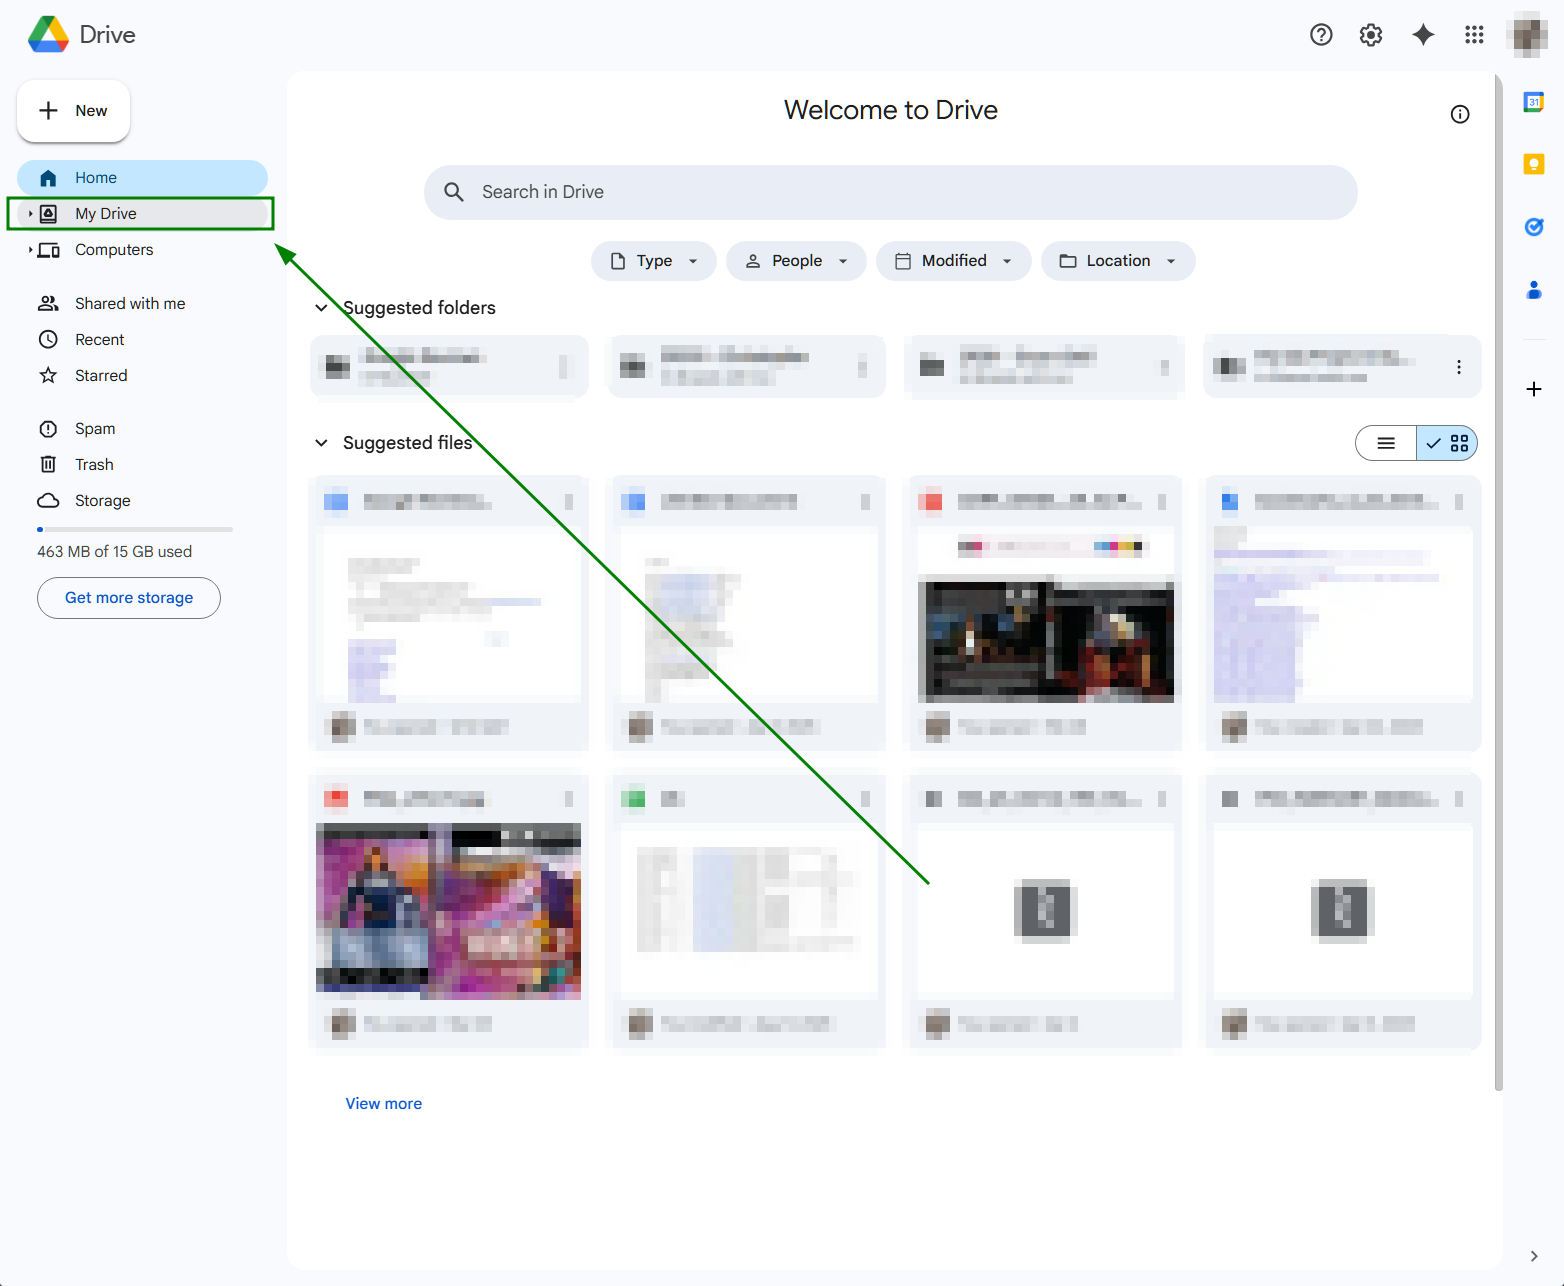
Step 1 — Open Google Drive and click My Drive
Head to drive.google.com and sign in to your account. Click on My Drive in the left-hand sidebar to get started.
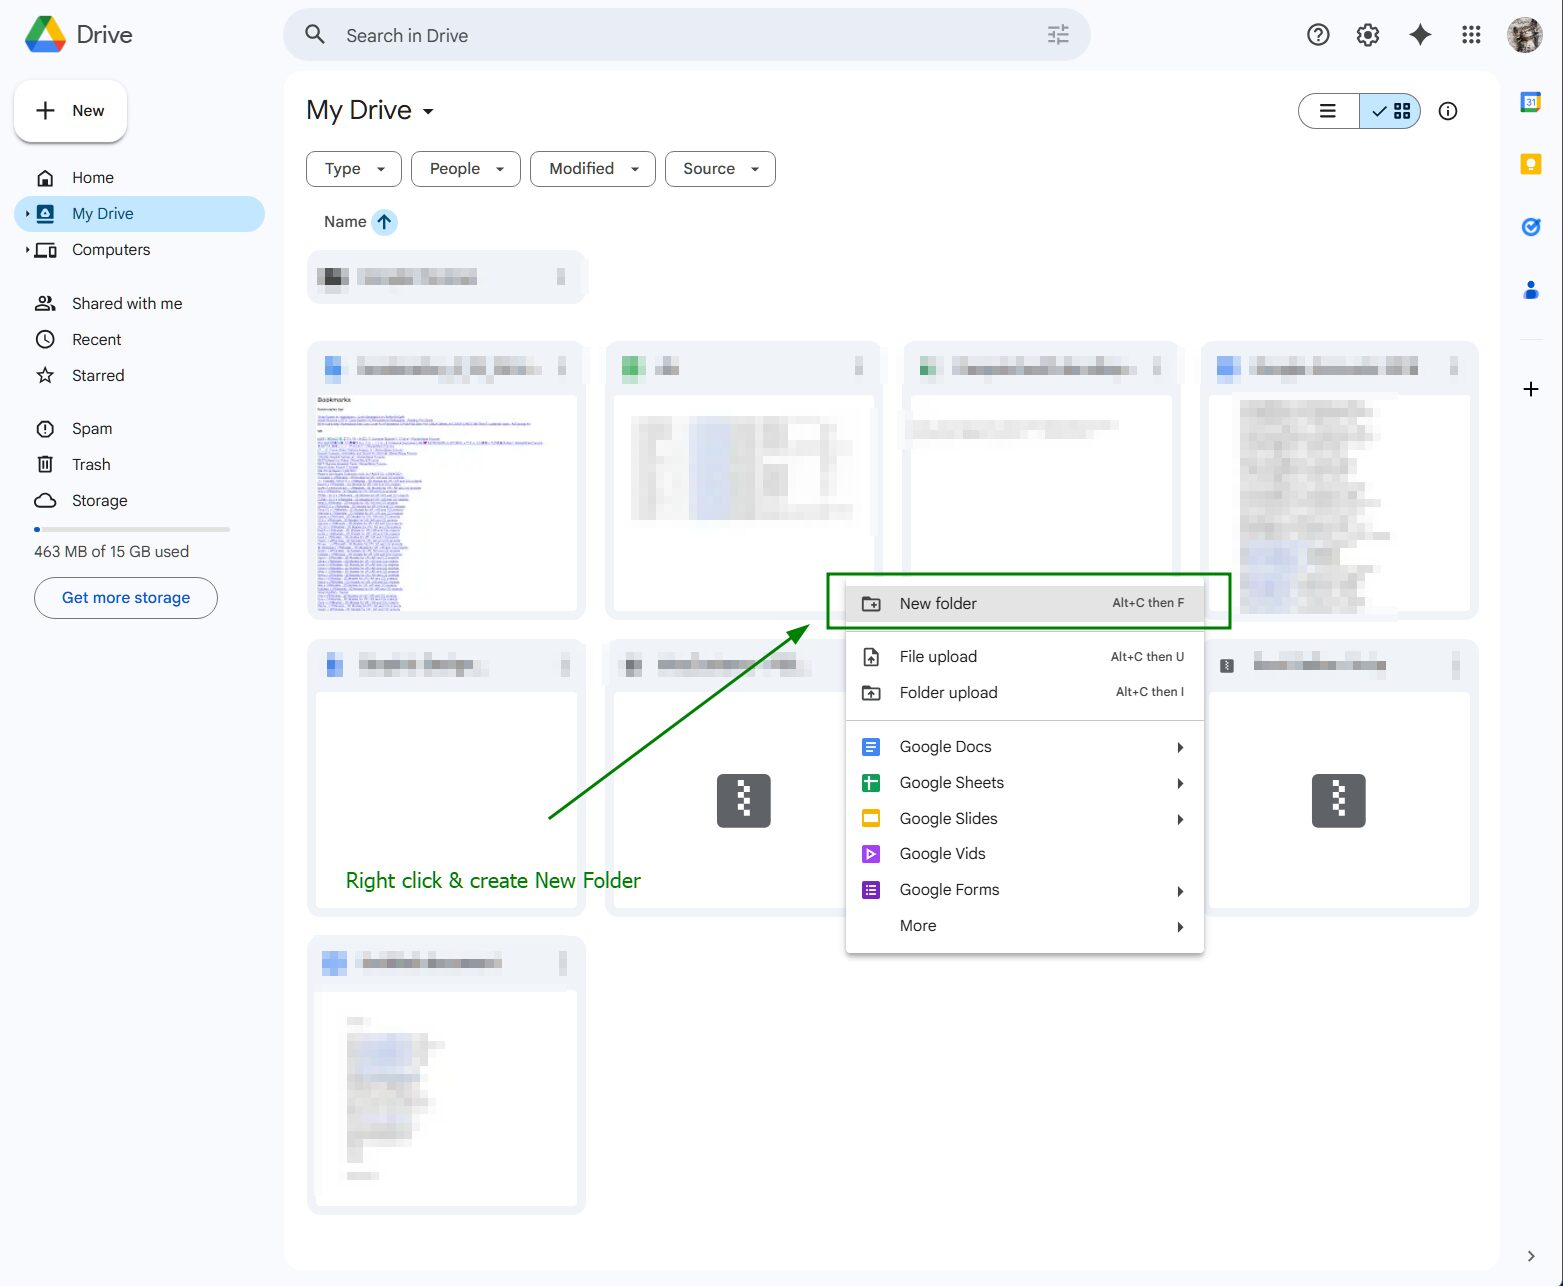
Step 2 — Right click anywhere and create a New Folder
Right-click on any empty area within My Drive and select New Folder from the context menu.
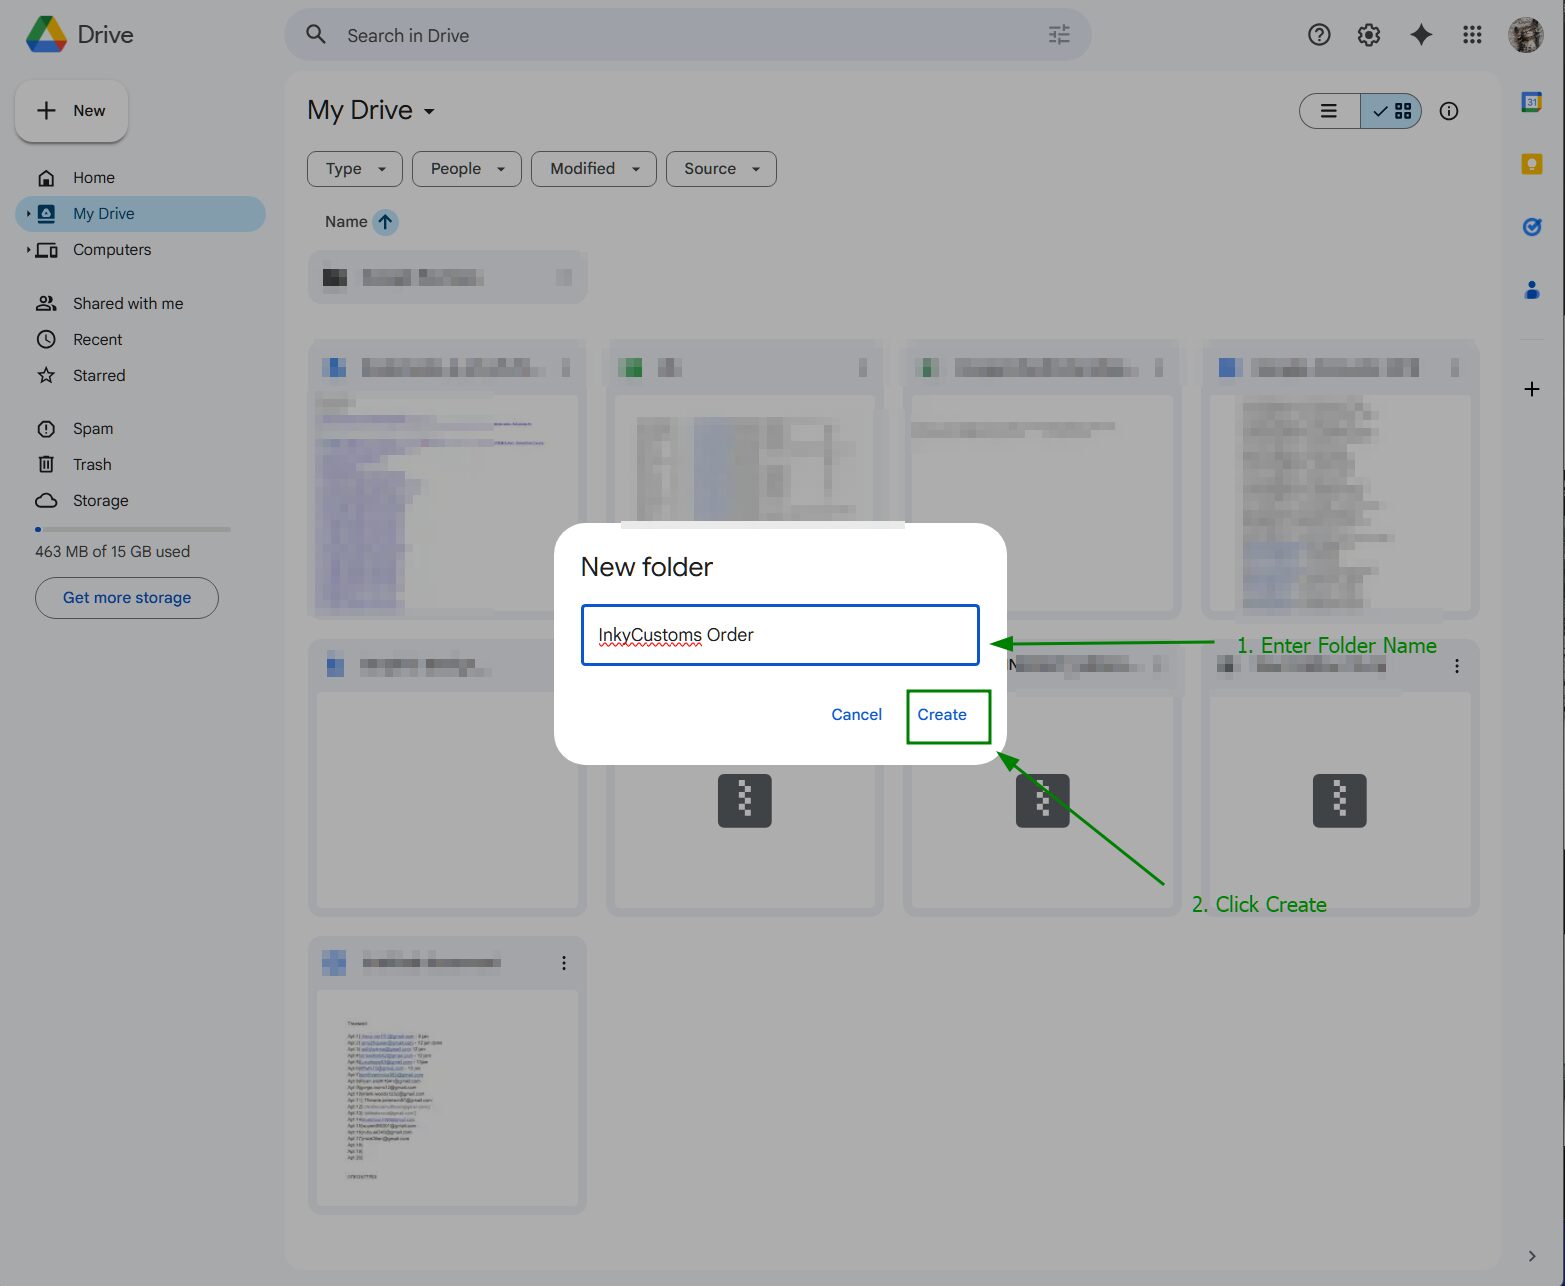
Step 3 — Name your folder (e.g. InkyCustoms Order) and click Create
Type a name for your folder — something like InkyCustoms Order — then click Create to confirm.
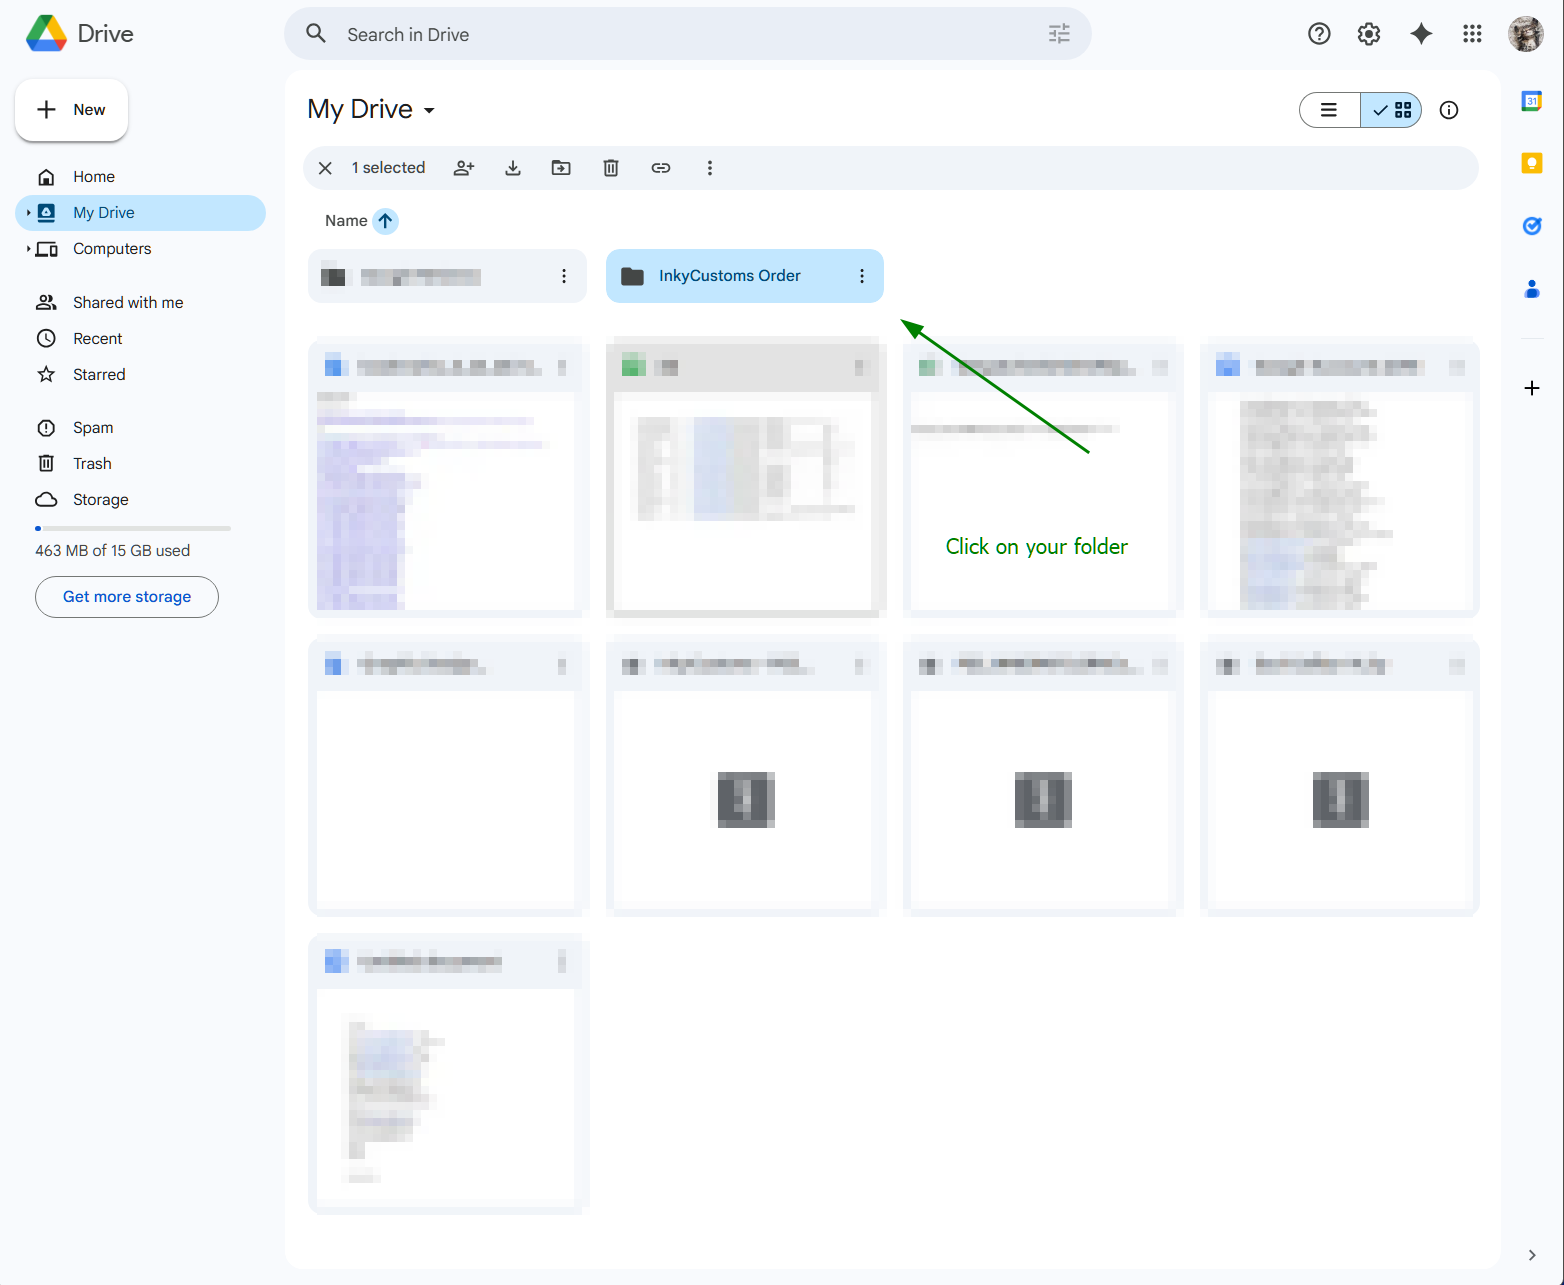
Step 4 — Double click your new folder to open it
Find your newly created folder in My Drive and double-click it to open it.
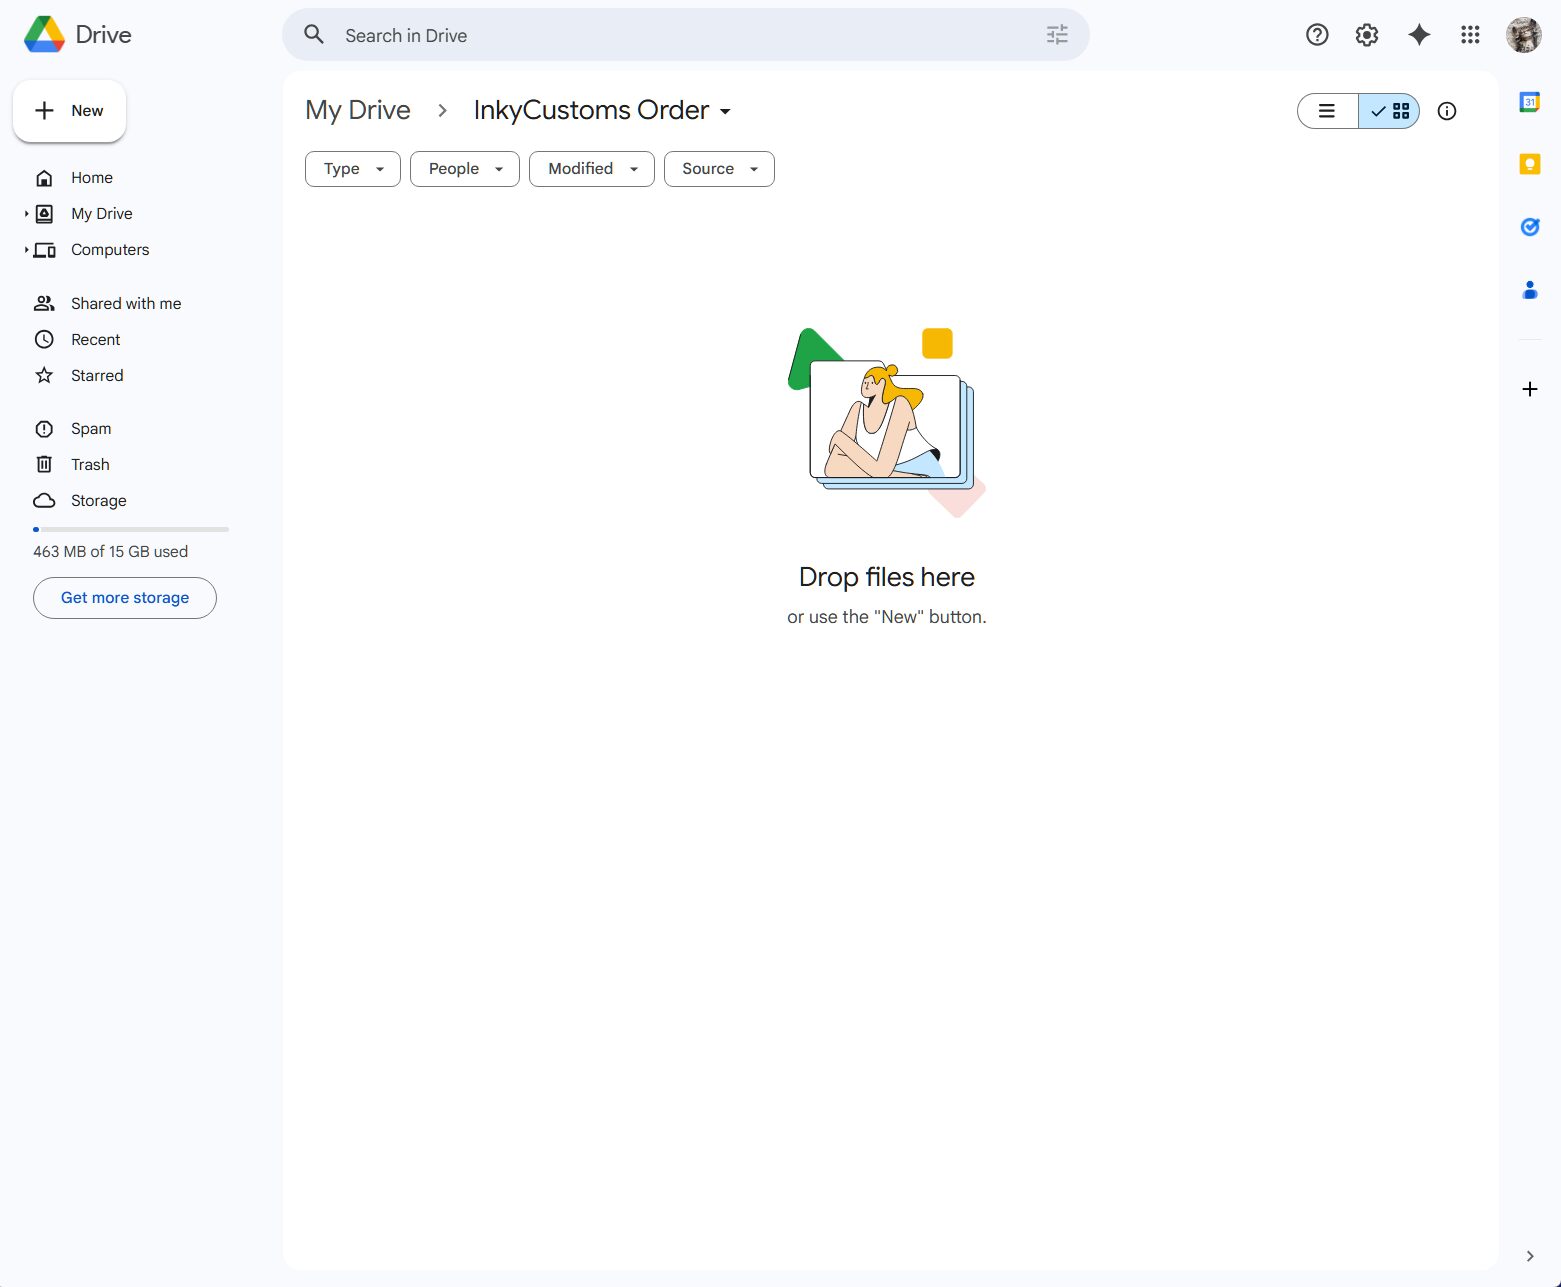
Step 5 — Your empty folder is ready for files
Your new folder is now open and ready. You’ll see it’s empty — that’s fine, we’ll add your design files next.
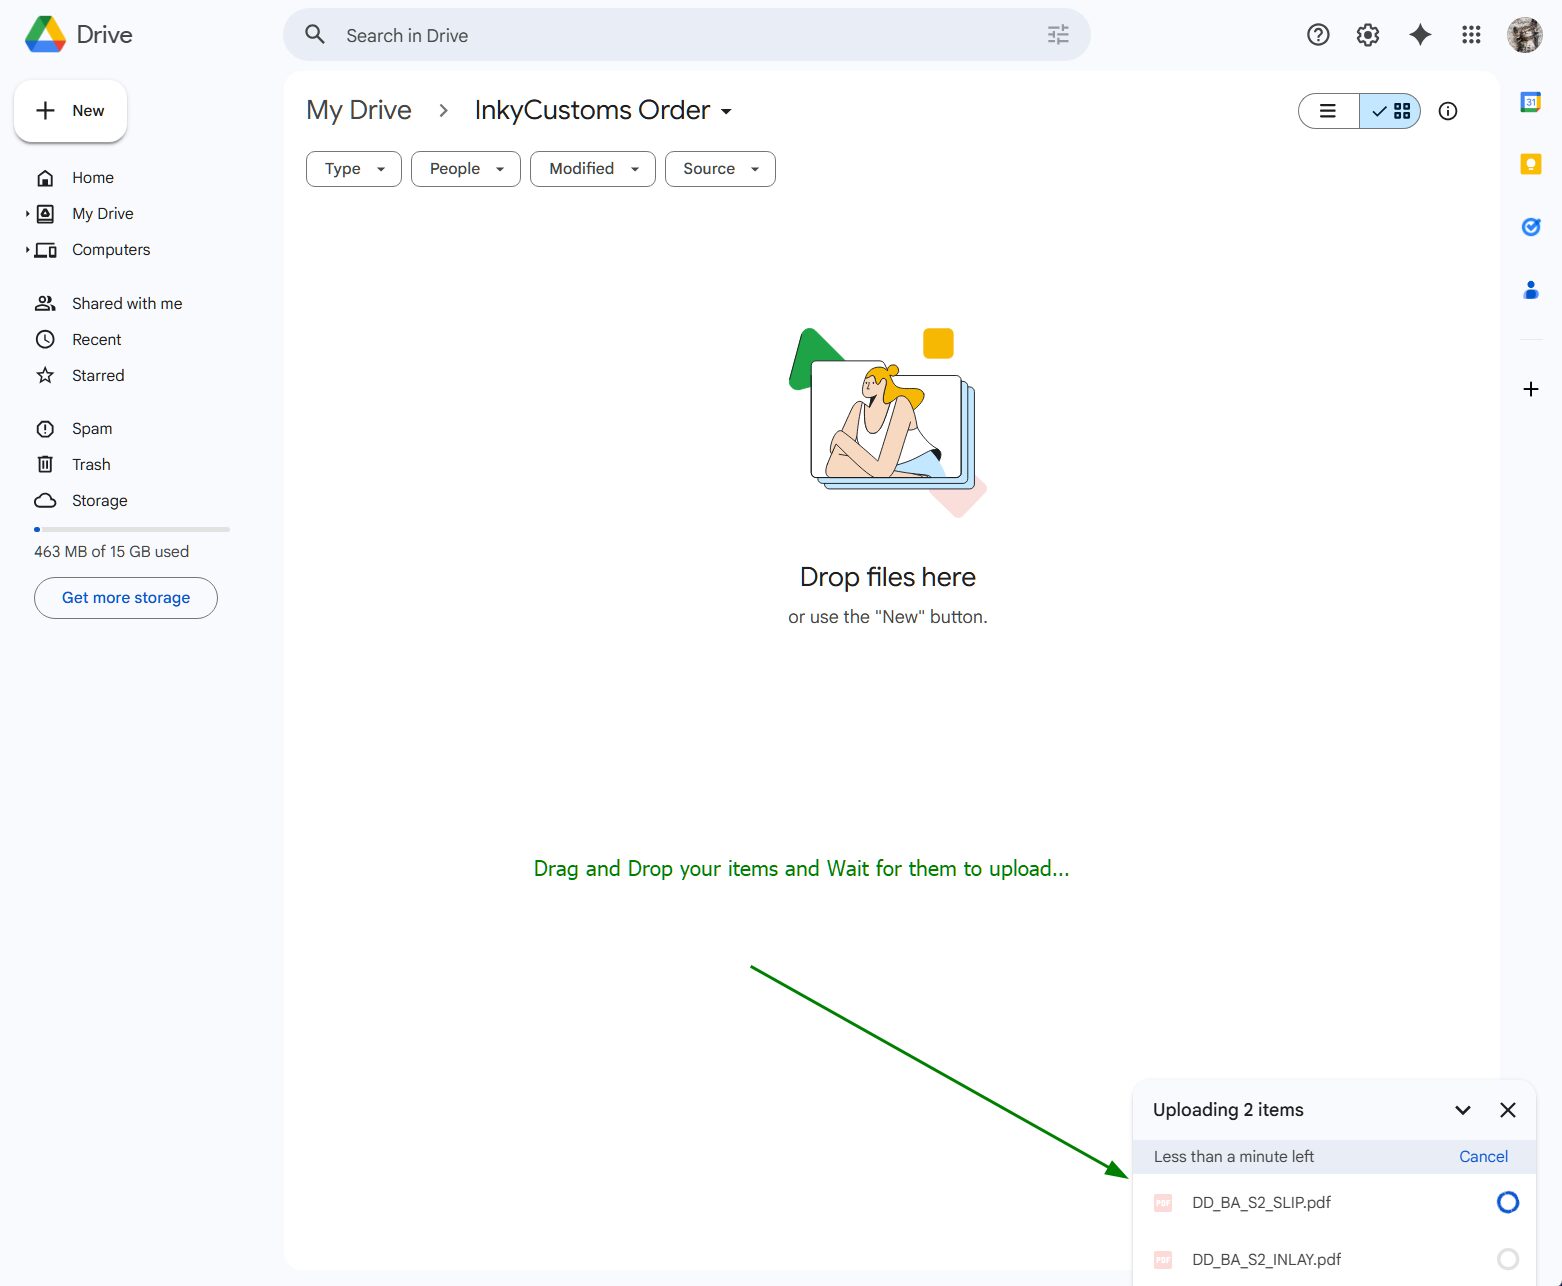
Step 6 — Drag and drop your design files and wait for them to upload
Drag your design files from your computer and drop them into the open folder. Wait for the upload to complete before moving on.
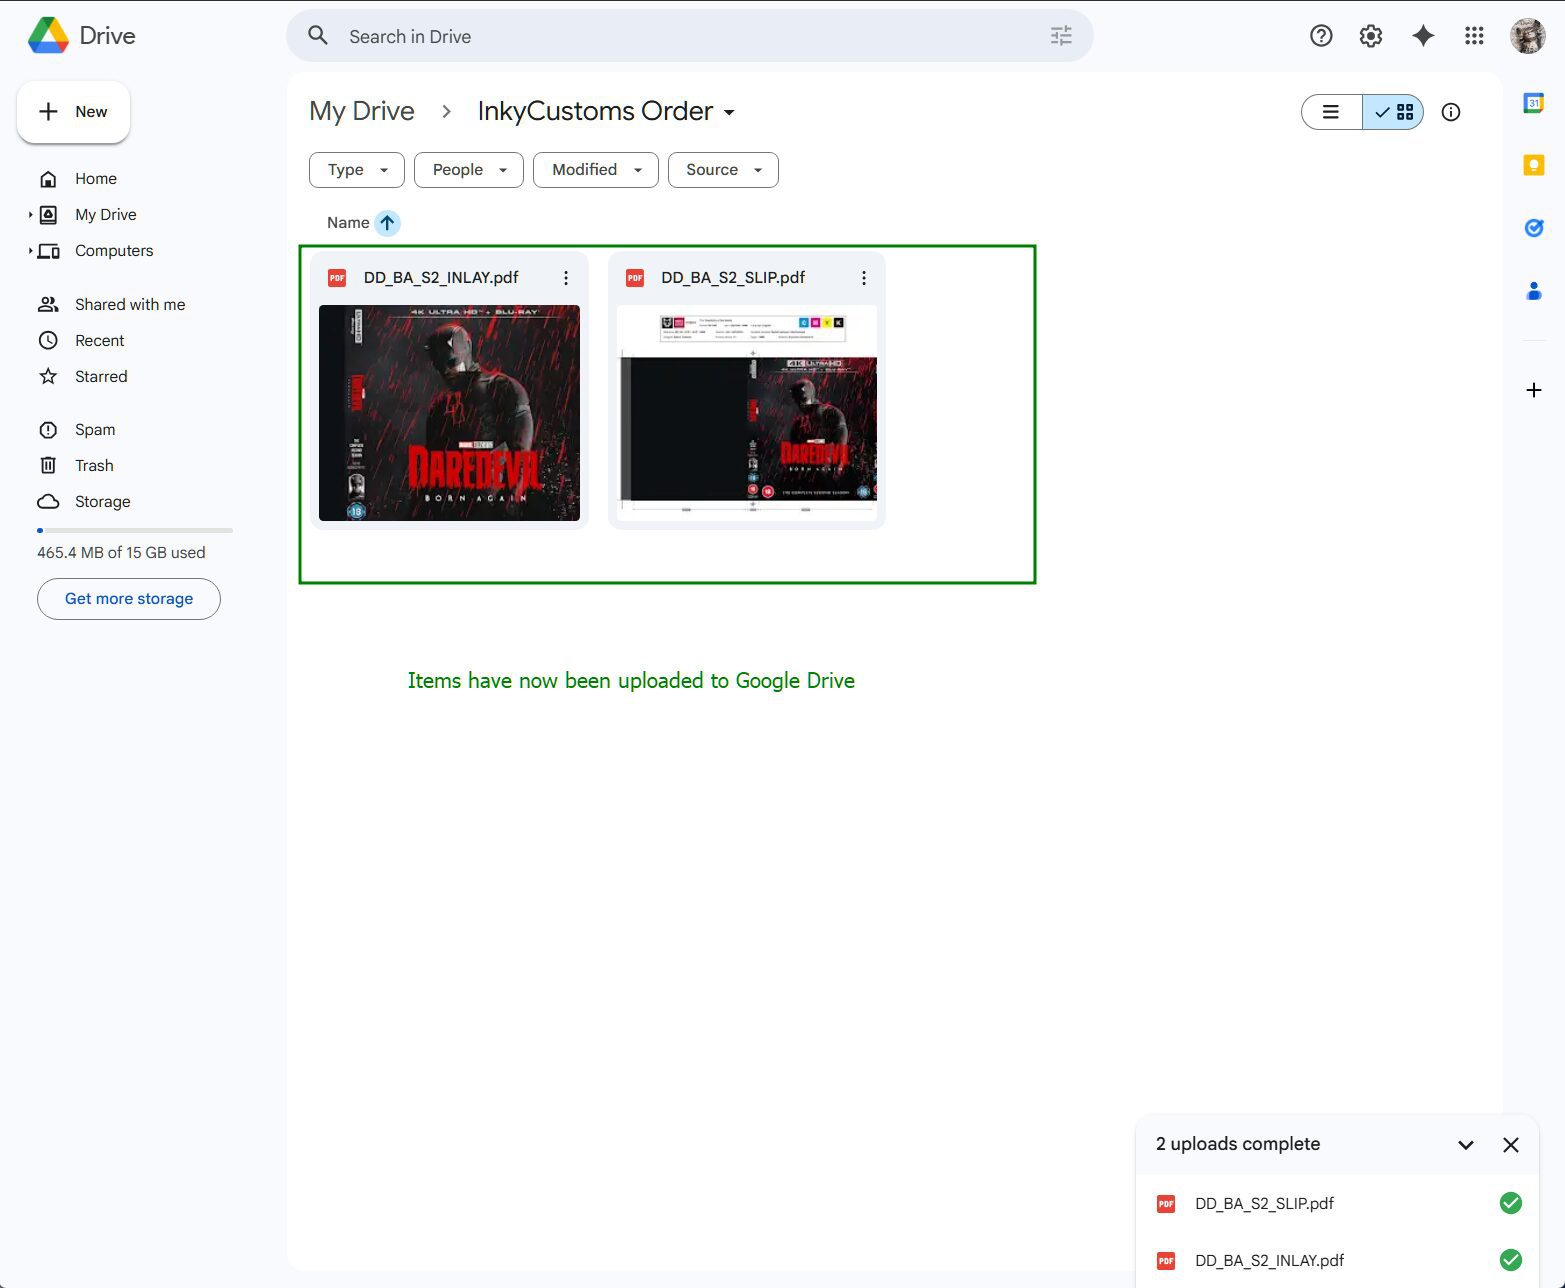
Step 7 — Confirm your files are showing in the folder
Check that all your design files are visible inside the folder. Make sure every file you need has uploaded successfully.
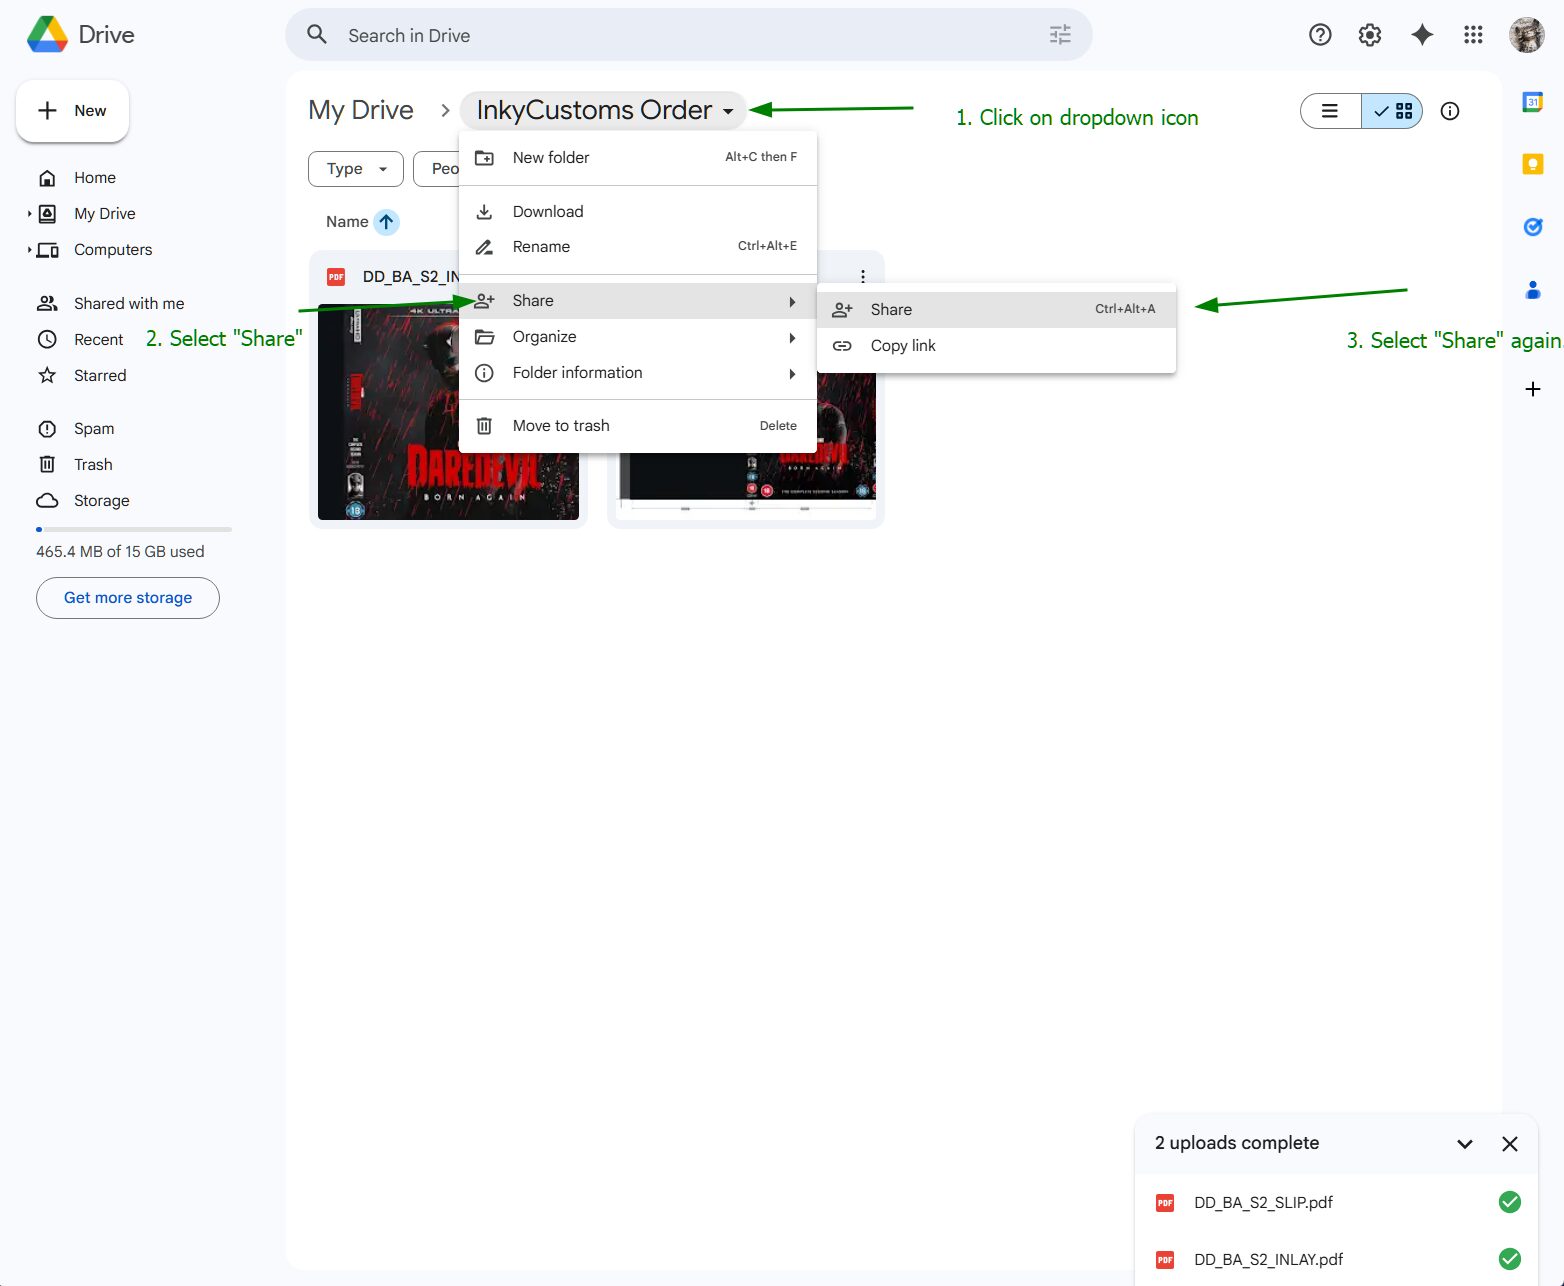
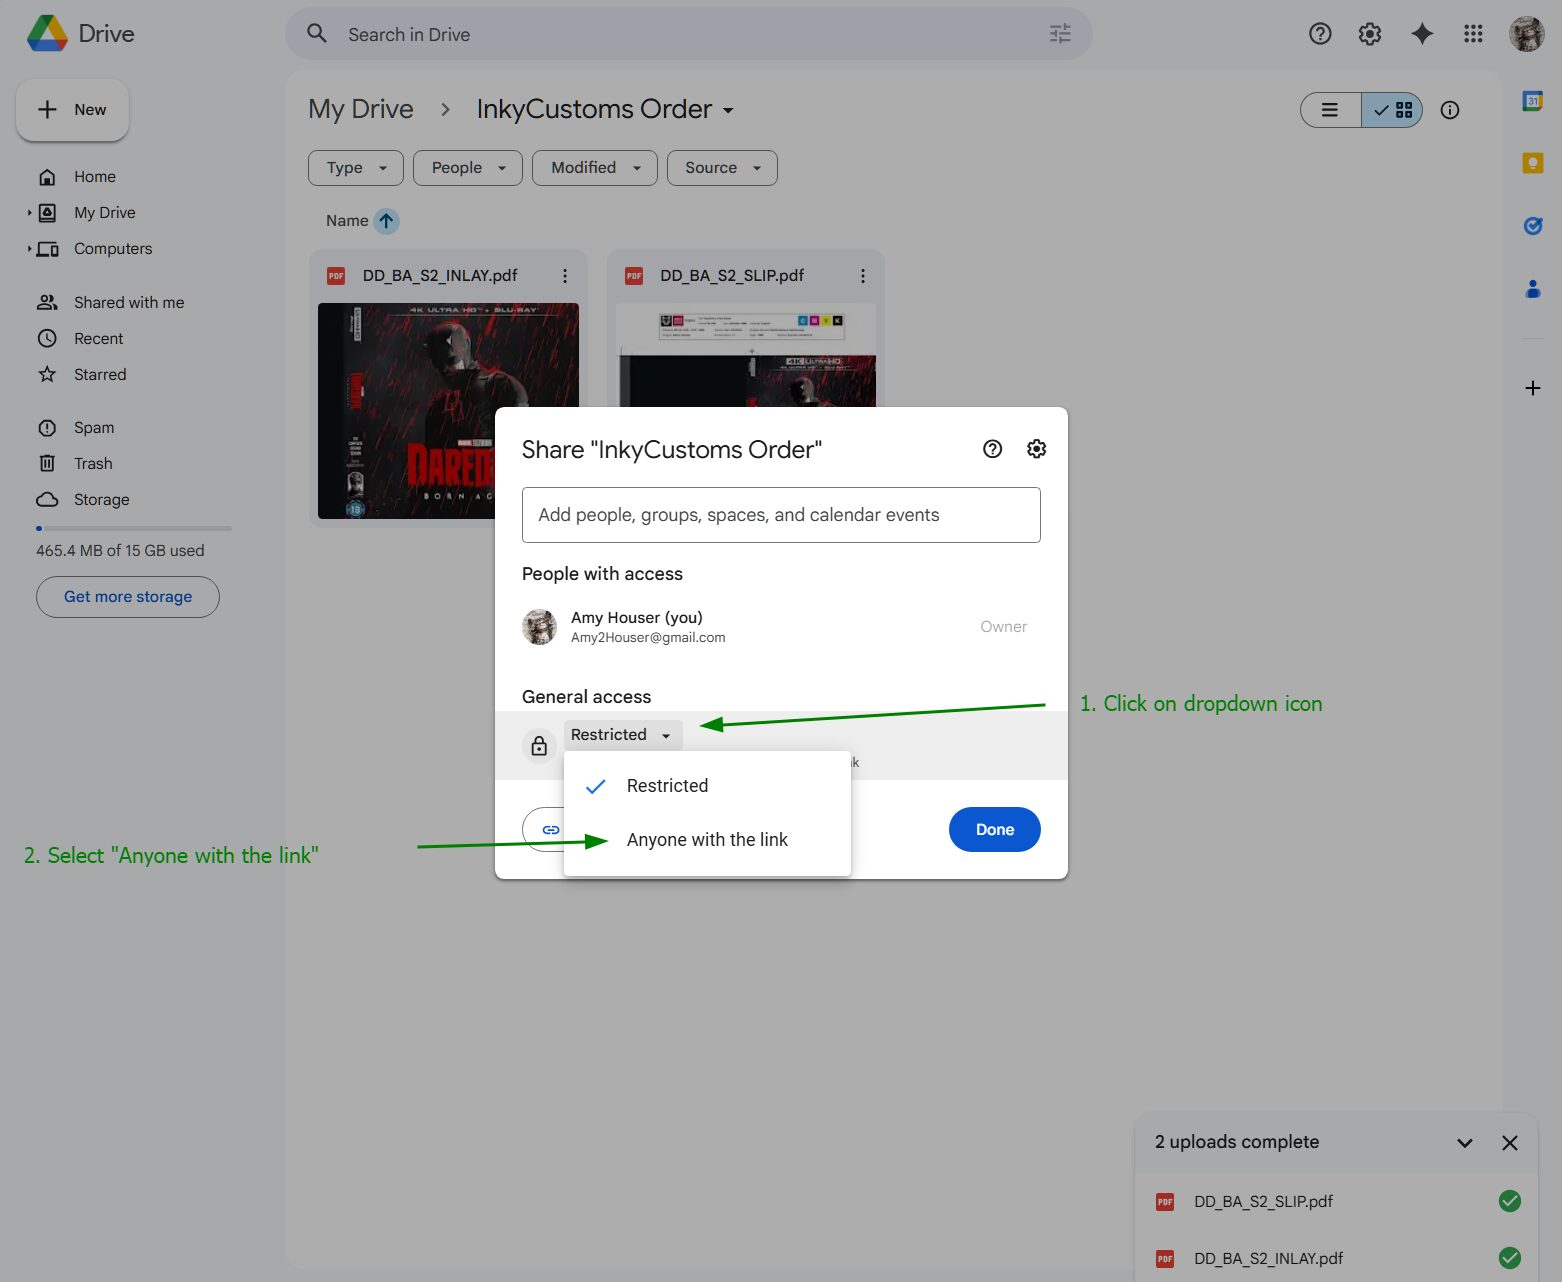
Step 8 — Click the dropdown next to the folder name, go to Share then Share again
Click the dropdown arrow next to your folder name at the top, hover over Share, then click Share again in the submenu.
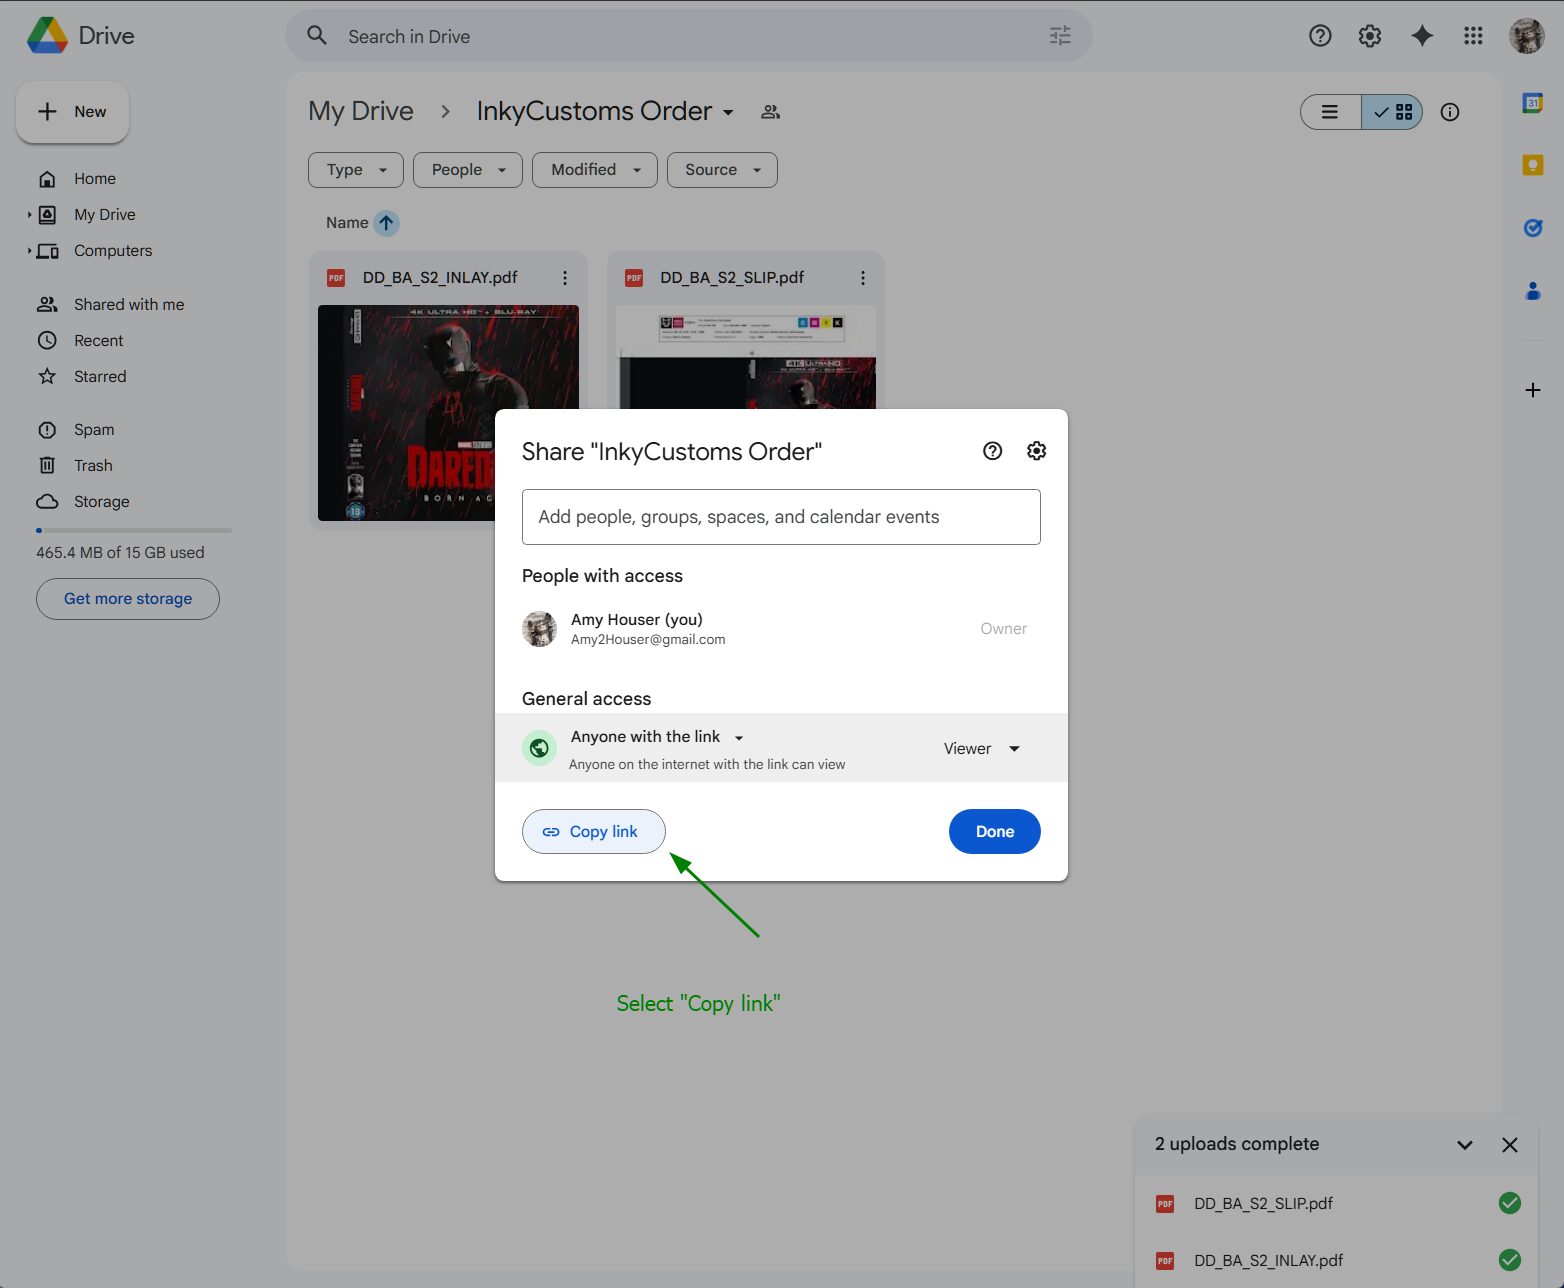
Step 9 — Change General Access from Restricted to Anyone with the link
In the sharing settings, find the General access section and change it from Restricted to Anyone with the link.
Step 10 — Click Copy link
Click the Copy link button to copy your folder’s shareable link to the clipboard.
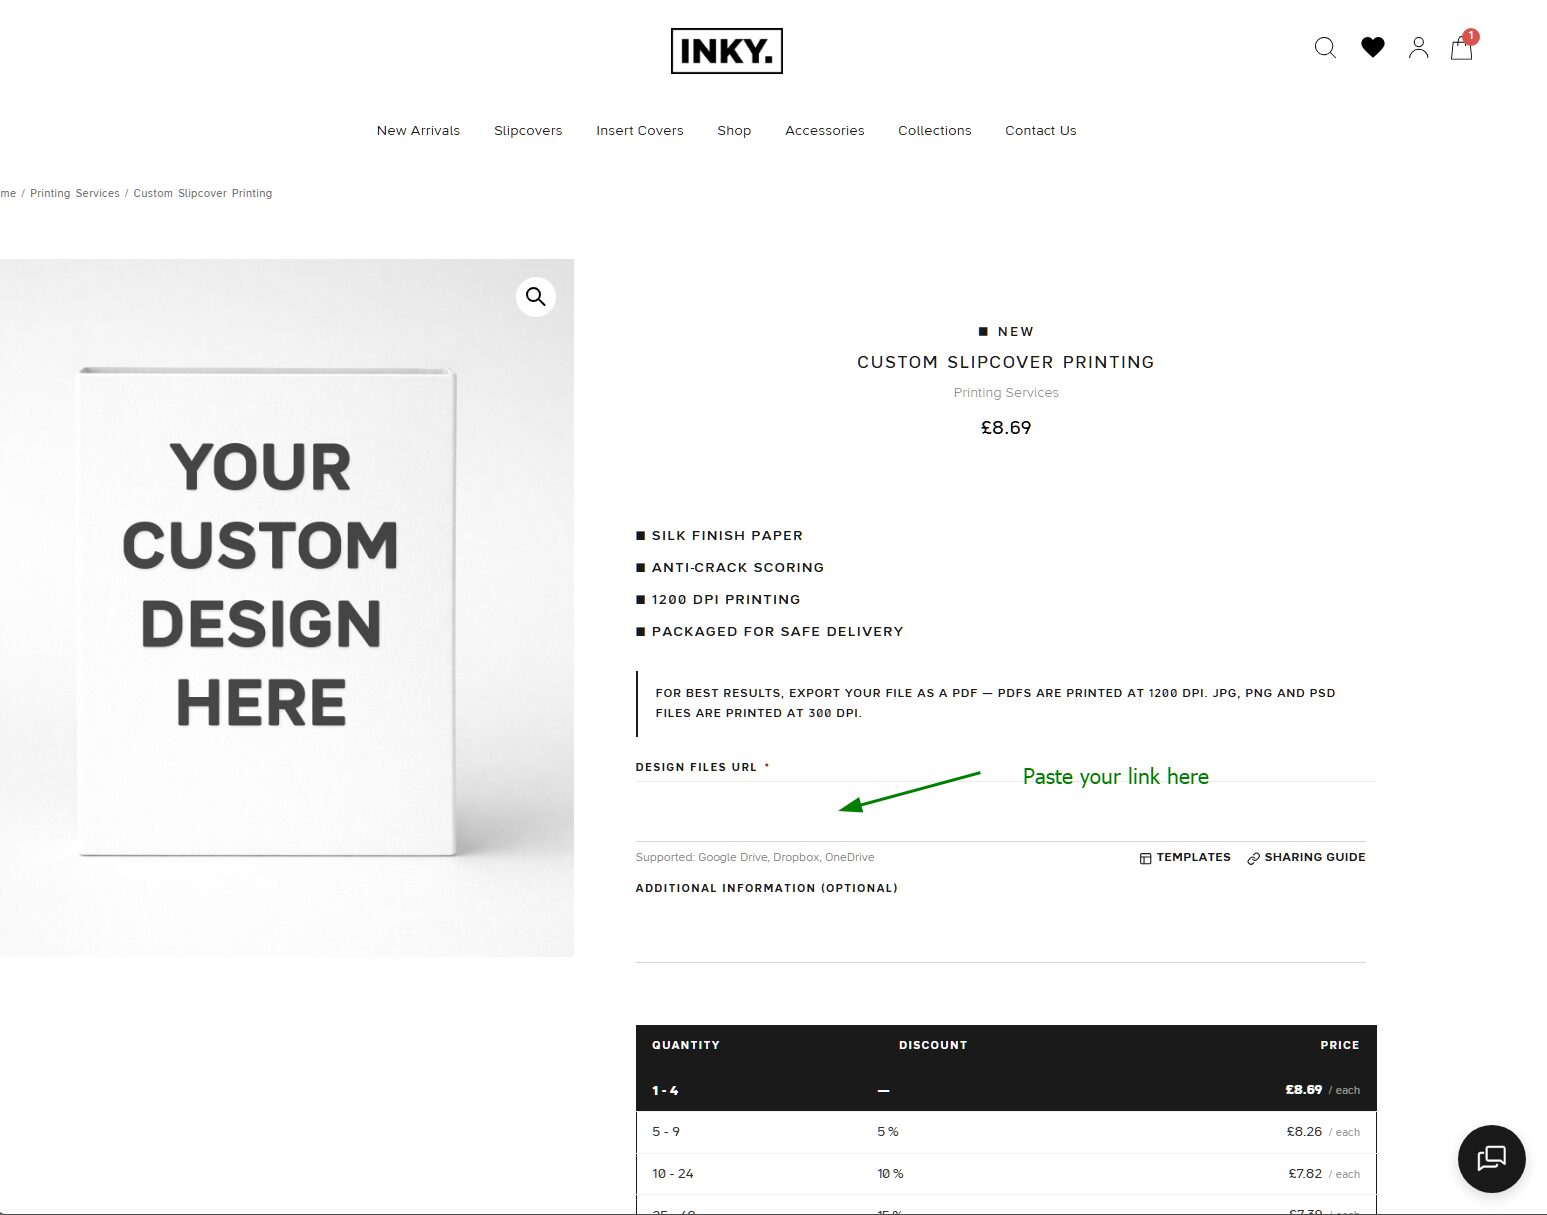
Step 11 — Go back to the InkyCustoms product page and paste the link into the Design Files URL field
Return to the InkyCustoms product page and paste your copied link into the Design Files URL field.
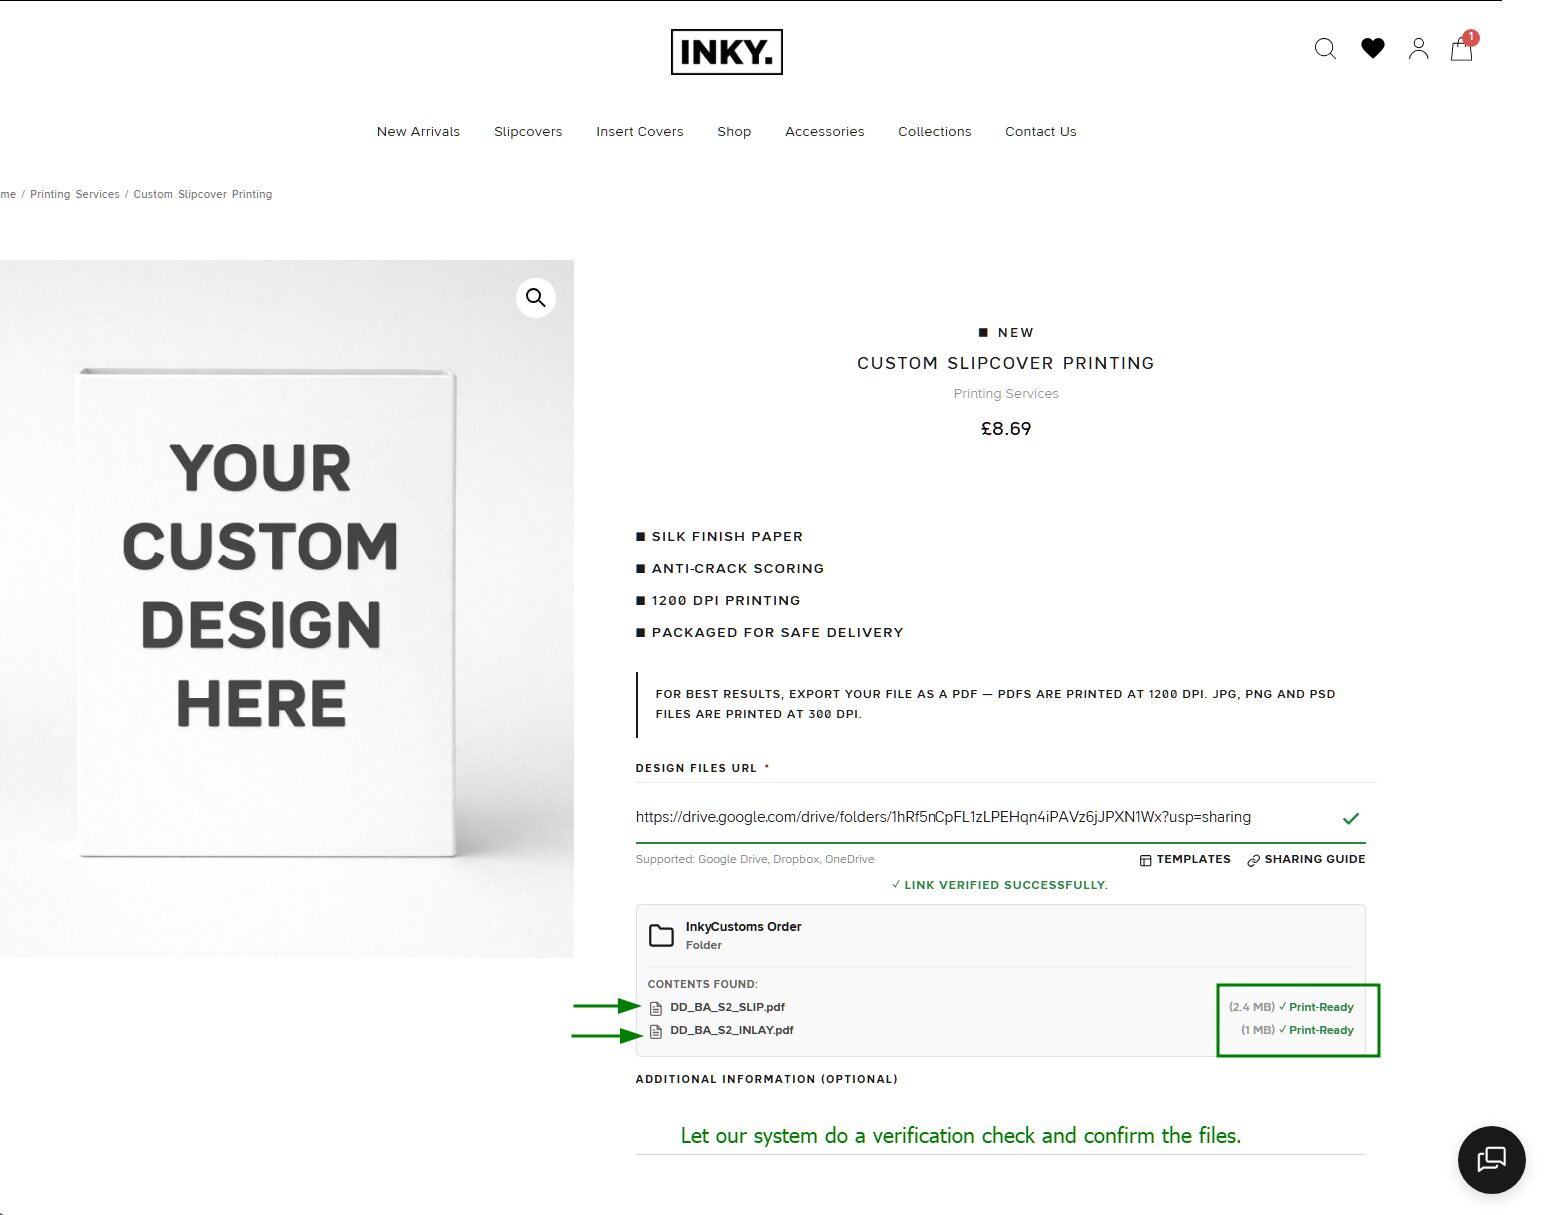
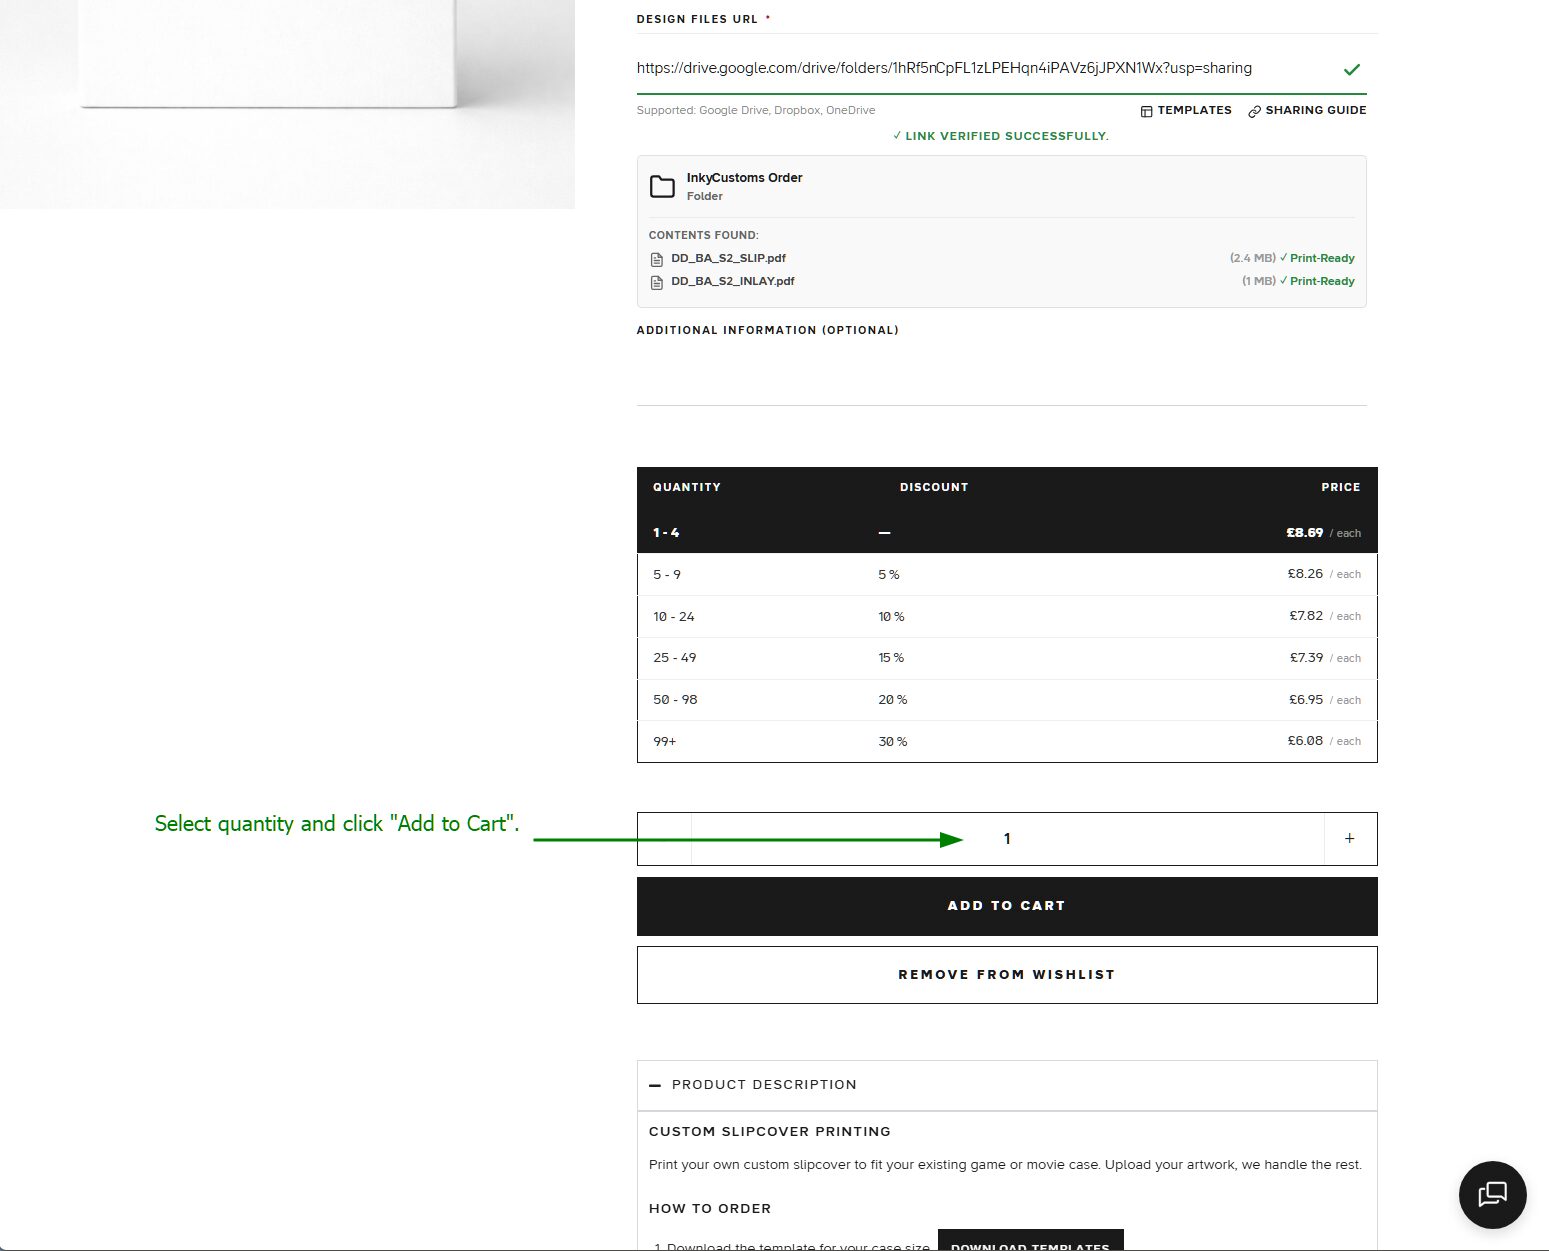
Step 12 — You should see Link Verified Successfully with your files listed
After pasting the link, you should see a Link Verified Successfully message along with your uploaded files listed below it.
Step 13 — Select your quantity and click Add to Cart
Choose your desired quantity and click Add to Cart to complete your order.
Having trouble? Contact us and we’ll be happy to help.